The IFComp dust has settled, and my entry Moon Logic managed to place 38th out of 85. Not bad for a “REALLY BAD IF Jam” wannabe entry. Why enter at all if I already suspected it wouldn’t end up in the top ranks? All the feedback I received made participating well worth it!
Origins
But let us start at the beginning. Let us start at… Bad stuff. Unpopular choices. Terrible games. (In your opinions) - #4 by Lancelot .
Now, I am a perfectionist at heart, so participating in a BAD IF jam sounded like a bad idea at first. But… if I could produce something truly horrible, yet interesting enough for players to keep playing beyond the first move, and wrap it all up in a nice, shiny package, might that actually work out?
I quickly settled on the Zork I environs, which in itself is bad enough, and would allow me to subvert expectations by adding even more moon logic. I repurposed the table-driven logic I had created for my One King entry in IFComp 2023, including its Roger/Wilco commentary track mechanic (not yet used in a public release), and ended up with something that seemed bad enough for entry into the jam. But it left me unsatisfied.
I had released a Twine version of One King for Spring Thing 2024, and I was very happy that it could run well on both mobile and PC. The parser version from IFComp 2023, however, only worked comfortably on my PC, and the same applied to the parser version of Moon Logic.
When I beta-tested The Trials of Rosalinda, I realized that Twine might be very well suited for implementing a world model. That became the root idea for creating Moon Logic in Twine: using choice mechanics for input, a world model underneath, and parser-like mechanics for output.
Designing the UI
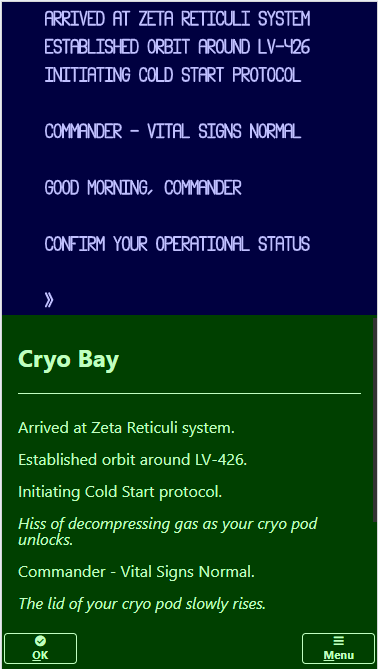
The movie Alien: Romulus, which came out in August 2024, inspired me to try creating an Alien-themed Hunt the Wumpus game with a split screen for graphics and text, and a command panel with one or more buttons for the player to press: allowing for basic commands like moving around, detecting aliens, and blowing them up. You know the drill.
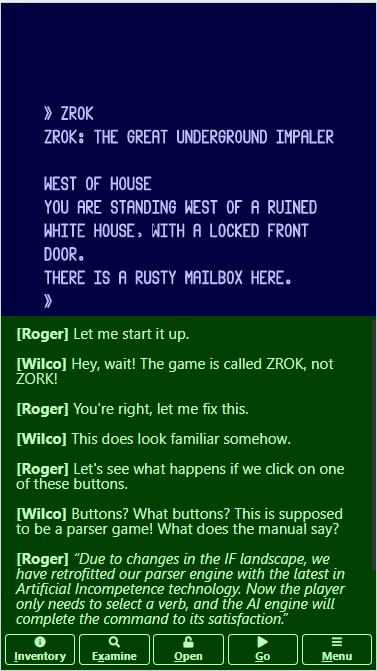
That Alien-themed game is still a WIP, but it did provide me with the basic UI design. For comparison, here are screenshots of both games in Portrait orientation:
Technical details
I basically used a custom StoryInterface with three elements:
<div class="viewer"><canvas id="canvas"></canvas></div>
<div class="talker" id="talker" data-passage="Talker" aria-live="polite"></div>
<div class="worker" id="passages"></div>
The canvas element holds the HTML canvas element, on which I draw using JavaScript code managed by a requestAnimationFrame() callback. The talker element contains a custom passage for text output. Feedback during beta testing taught me to mark this element as aria-live="polite", to ensure that changes in this element are read out by a screen reader. The worker element represents the main passage of the Twine game, and holds one or more buttons. Pressing a button triggers a passage transition, and allows me to use the save/load mechanism provided by Twine.
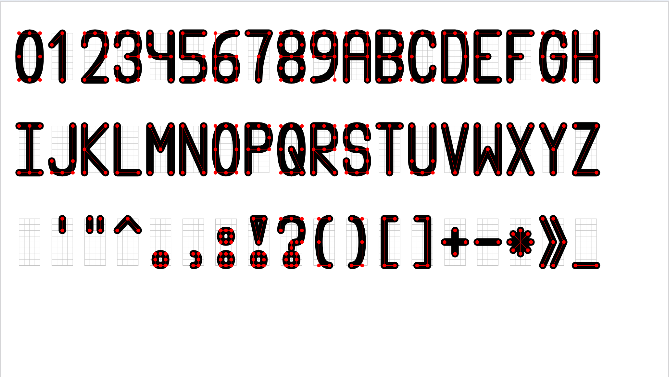
The Terminal Emulator
In both games, I wanted to emulate a computer terminal. I first tried creating this in Canvas using text primitives, but I needed more control over text placement than provided, so in the end I drew the text myself. For that, I needed some kind of typographic design, so I created one. The design evolved over time, and I’ll probably re-import the latest version to ensure a consistent look and feel:
The terminal outputs text at a rate controlled by a game speed setting in the Options menu. I’m well aware that timed text effects are considered a Bad Thing, so I provided escape hatches to skip the timed effects and display all pending text on the screen:
- Clicking or tapping on the viewer/talker elements
- Pressing the Enter key or the space bar
An alternative approach is to play the game in Screen Reader mode, where the terminal text and commentary are interleaved (so the order of events is preserved) and dumped onto the talker screen all at once, eliminating timing effects entirely (Screen Readers can’t really handle this well.)
The Command Buttons
I had several discussions with the Twine community about how to properly handle buttons. I wanted a fixed number of buttons spread across the bottom of the screen, each containing an icon and a text label, ideally with keyboard shortcuts.
I ended up placing the icon above the text label in portrait mode to provide more space for the labels, and I sized the text based on the viewport width. I also made use of easy keys, a handy bit of JavaScript for adding keyboard shortcuts to all command buttons.
For the icons I used the sc-icons font used by SugarCube, which avoided the need to create or add my own. A bit of creativity in selecting suitable icons to match the commands can go a long way.
Creating the World Model
In the Twine version of my One King game, I made heavy use of widgets to model rooms, the room contents, and the commands available to the player. I could get away with it, since all portable objects in the game were modeled as simple variables and had only four states:
- at its default location
- carried by our Barbarian
- in some alternate state (for example, a weapon would be reported as broken)
- gone
In Moon Logic, I decided to implement the world model in JavaScript, and define a set of functions to be called upon by Twine code, implementing an interface between the game engine in JavaScript and the UI handling in Twine.
Object Types
For Moon Logic I did not want to create a full-blown world model yet; instead, I settled for the bare minimum needed to implement my game and decided to include the following object types:
| Type | Sample ID | Name | Notes |
|---|---|---|---|
| Room | WEST | West of House | LOOK will be executed at game start |
| Door | FRONT | front door | Between West of House and Entrance Hall; not openable |
| Scenery | HOUSE | white house | At West of House |
| Actor | TREE | large tree | At Forest Path |
| Container | MAILBOX | rusty mailbox | At West of House; not portable |
| Thing | LEAFLET | torn leaflet | In rusty mailbox |
I considered adding a Backdrop type for the white house, so it could be examined from both West of House and Behind House, but decided it wasn’t worth the effort.
In a similar vein, adding a Supporter type for the kitchen table ended up on the cutting floor, alongside the table itself, which didn’t really contribute to the game mechanics. (I also discovered that properly printing room details when supporters are present was more complicated than anticipated.)
Object Properties
I defined a bunch of arrays to hold all object properties. These arrays, together with a few variables, comprise the entire world state. I could have taken a more object-oriented approach, but this was the easiest for me to implement. A short overview:
| Property | Type | Range | Purpose |
|---|---|---|---|
| Name | string | any printable string | Print the name of the object |
| Type | number | ROOM..THING | The object type |
| Parent | number | -1..KEY | The object’s location (-1=nowhere,0=player) |
| Examinable | number | 0/1.. | Examinable if odd |
| Takable | number | 0/1.. | Takable if odd (applies to Containers and Things) |
| Openable | number | 0/1.. | Openable if odd (applies to Doors and Containers) |
| Visible | number | 0..1 | Visible if nonzero (calculated) |
| Leaves | number | 0..10 | Number of leaves (applies to Rooms and the player) |
I used numbers for the Examinable/Takable/Openable properties (instead of simple boolean flags) because I wanted to track how many times the player changed state of any given object, so Roger and Wilco could provide proper commentary on the player’s actions.
Verbs
I decided to stick to mostly well-known verbs in parser games, and ordered them thus:
| Verb | Noun | Item | Purpose |
|---|---|---|---|
| Look | - | - | Show room contents |
| Inventory | - | - | Show player’s inventory |
| Examine | Object | - | Show object details |
| Take | Object | Parent | Take portable object (Container,Thing) |
| Drop | Object | Parent | Drop portable object (Container,Thing) |
| Open | Object | - | Open openable object (Door,Container) |
| Close | Object | - | Close openable object (Door,Container) |
| Eat | Thing | - | Consume edible thing |
| Feed | Actor | Thing | Feed actor with thing |
| Attack | Actor | Thing | Attack actor with thing |
| Unlock | Door | Thing | Unlock door with thing |
| Go | Room | Direction | Go to the room using direction |
The first verb group (Look, Inventory, Examine) provides information to the player and can be exhausted (i.e., the player can execute these actions until they are no longer applicable to the current game state and are therefore not shown in the row of command buttons).
The second group (Take, Drop, Open, Close) can be reduced to at most two active verbs most of the time (Drop, Close). We assume here that the player takes and opens everything in sight, the usual modus operandi for experienced adventurers, with some exceptions:
- Sometimes the player needs to close containers to avoid dropping things into them.
- Sometimes the player needs to drop some, but not all, of their inventory to make progress.
Instances of the third group (Eat, Feed, Attack, Unlock) always exhaust themselves and result in an Achievement, signaling progress to the player.
Finally, the Go verb allows the player to move to another room, provided there is an open exit available and the player isn’t in a dark room without a light source.
Assuming the player always eliminates verbs in the first and third groups whenever possible, it would seem we can get away with offering at most three verbs at any time. In the first incarnation of the game, this was indeed the case.
However, my favorite actor, the iconic thief, was merely functioning as a blocker to be dealt with and played no active role in the game. I therefore absolutely had to include some kind of maze (fitting the Moon Logic theme perfectly), just so I could hit the player with You hear someone saying “My, I wonder what this fine … is doing here.” whenever they left their precious goodies unattended in the maze.
At that point, I had to increase the verb offering to four, because the player would need to drop something in the maze rooms (something the thief would not take away) while still keeping their light source in order to move to another maze room. This meant that both Take and Drop could be available at the same time, along with either Open or Close, since the player needs to bring at least one container into the maze.
Implementing the game loop
I created a Twine passage for each of the twelve verbs. The main purpose of each passage is to provide commentary on the player´s actions by Roger and Wilco. The game pretends that Roger is playing, while Wilco provides his expert commentary. Of course, we all know who´s really pushing the buttons here…
Each of these passages includes the Verb passage at the top; I probably could have made that a PassageHeader instead (although I’d have to exclude the Title and Start passages). Each passage also includes the Commands passage at the bottom; similarly, I probably could have made that a PassageFooter instead (excluding the Title passage).
The Verb passage basically does the following:
- Loads the JavaScript game engine state from a copy stored in Twine variables.
- Comments on “Advanced UI” activity (at turns 50, 100, and 150).
- Applies the chosen verb to the world model (similar to “Carry Out” in Inform7).
- Reports the results of applying the chosen verb (similar to “Report” in Inform7).
- Checks and ranks all verbs for the player’s next turn (similar to “Check” in Inform7).
The Commands passage basically does the following:
- Creates a walkthrough for the current game state.
- Creates a button for each verb with a rank between 1 and 4.
- Adds one or more disabled buttons if less than 4 verbs are active.
- Adds the Menu button.
Pushing any of the command buttons associated with a verb does the following:
- Finishes any pending events.
- Selects the corresponding verb as the chosen verb.
- Saves the JavaScript game engine state into Twine variables.
- Navigates to the corresponding verb passage.
Implementing the walkthrough
The IFComp site allows participants to include a walkthrough of some sort under a Walkthrough button. Someone told me that some judges might forgo playing a game if no walkthrough is provided. I decided to add an Invisiclues-style document, with an author’s note at the end of each list of clues, providing some details on the game, and serving as a small reward for my dear readers.
In my One King entry for IFComp 2023, I included an automated walkthrough of sorts in the help text. Whenever the player asked for help, the game would provide that text along with some sample commands. The fun part was including the actual command (i.e., replacing the sample noun with the required noun at that moment) and hoping players might notice the difference.
I had some time left and decided to add an automated walkthrough for Moon Logic as well. I basically checked the conditions for all achievements and returned the walkthrough for the first reachable one. This allowed me to simplify the walkthrough implementation considerably and also kept the number of moves reported in the walkthrough under control.
Now, where I should hide that walkthrough? The Menu passage already reported on the achievements and would probably be seen many times. That left the Credits passage, which was already filling up most of the game screen; so adding the walkthrough text right underneath it might just work out.
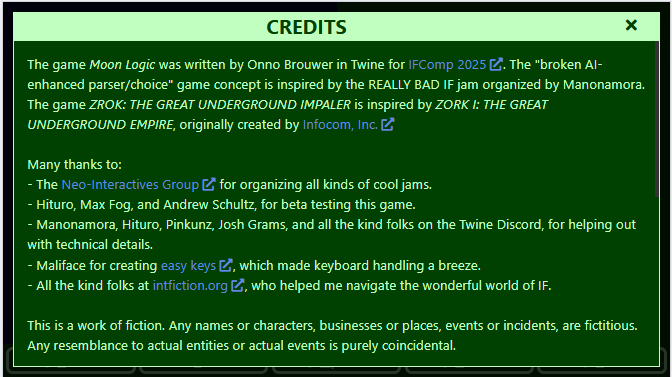
Scrolling a wee bit further:
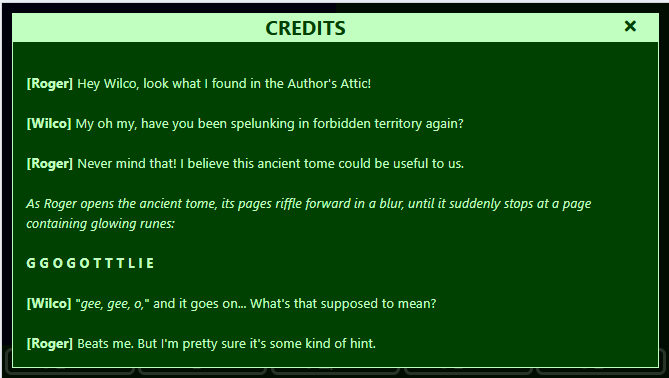
Here the keyboard shortcuts are shown for the commands to reach the first achievement from the start of the game.
So, in theory, one can finish the entire game by executing all the commands shown in the in-game walkthrough. I know at least one person who did just that. And this is what they would see as a reward:
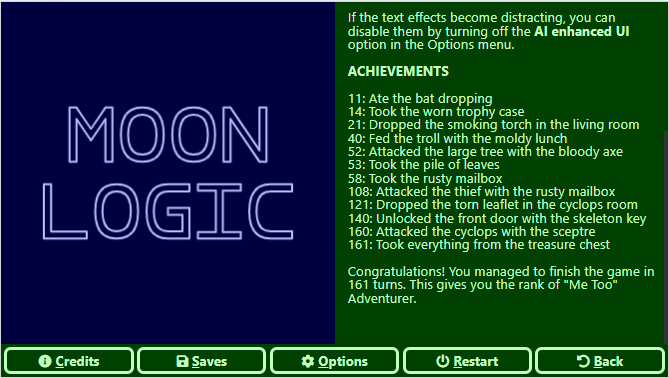
Each achievement is preceded by the number of turns needed to reach it; in total, the player would need 161 moves to finish the game and earn the title of “Me Too” Adventurer.
The Challenge
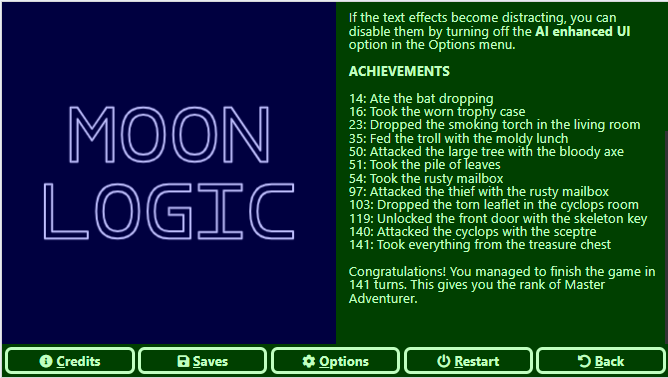
Get to the treasure before Mobile Support kicks in
Mobile Support (rotating the parser output every few seconds when the Advanced UI is enabled) kicks in at move 150; the challenge, therefore, is to finish the game in fewer than 150 moves. Can it actually be done? I daresay it can:
Now I better get back and start working on my other WIPs…
