However, I cannot get the passage box to appear in Sugarcube2 (I don’t need the header box). It works in sugarcube 1, and every other story format. I know I can just alter the background itself but I don’t understand why Sugarcube2 seems to ignore the:
portion of the stylesheet. Don’t stylesheets override some defaults?
And to be clear, these wouldn’t be periodic boxes that pop-up based on certain passages, they’d be around all the time for the entire game. If I could find a way to make the double border without it I’d use that instead. And the reason I’m avoiding using an image is that the boxes re-size themselves automatically.
I will assume this means that you’re only interested in showing the lower of the two double bordered boxes. eg there will be no bordered ‘image’ being shown.
As explained in the CSS box-sizing property’s documentation, that property is used to control how the total width & height of a targeted element is handled. And in my test project if was effecting dimensions of the elements contained within the #passages element.
It should be noted that those styles assume the usage of specifically CSS classed elements to work.
eg. That the ‘content’ of your affected passages looks something like…
<div class="content">
Lorem ipsum dolor, sit amet consectetur adipisicing elit....

[[Option 1|Another Passage]]
[[Option 2|Another Passage]]
</div>
If all you want to do is add a double border to the HTML element that represents the main ‘passage’ area of the page then CSS like the following…
I am not good with this kind of thing so some of the finer points in CSS elude me. But you had it all absolutely correct, and I understand now that the element is missing (or the name was changed?) in Sugarcube2 and that sent me off to the races.
I’m able to make the changes I need. Thank you IMMENSELY.
I realise this is a bit of a longshot, but if one were to want to keep the image box and they were inexperienced with Sugarcube/CSS, how would they go about it?
Meg, can you elaborate a bit more on the effect you’re going for? And are you also using Twine 1.4.2.?
I think the glorious trainwrecks template requires minimal knowledge of CSS if you’re using it as is, but if you need to make alterations you’ll need to know where and what to tweak. So it depends on what you’re using and what you need.
I’m using the most recent version of Twine (sugarcube).
I had trouble copying it straight over, though I will admit that my CSS knowledge is very low and I started getting mixed up when it spoke about the image tags/tag CSS. When I copied it straight in, I do get a text box. Success! But the image, I guess is the bit that is giving me trouble.
Again, I do apologise, I have a low level and am just beginning. Thanks
Keep in mind Twine 1.4.2. and Twine 2.3.9 are very different versions of Twine. 1.4.2. is recommended for image heavy projects, installs on your computer, and is no longer updated. That also means for the purposes what you’re asking referencing the image will be different when using the Trainwrecks template.Also you’ll see in my examples that I’m using 1.4.2.
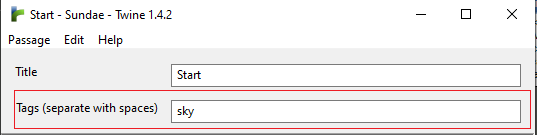
First, though, you gotta cover your bases. So you copied over the code into a text box and under tag you named it style sheet like so?
That means the passage and the tags part of the passage are named stylesheet. The different caps are important. Lower case for tags. Setting up stylesheets is much more straight forward in the newest twine but altering the one for a project is different.
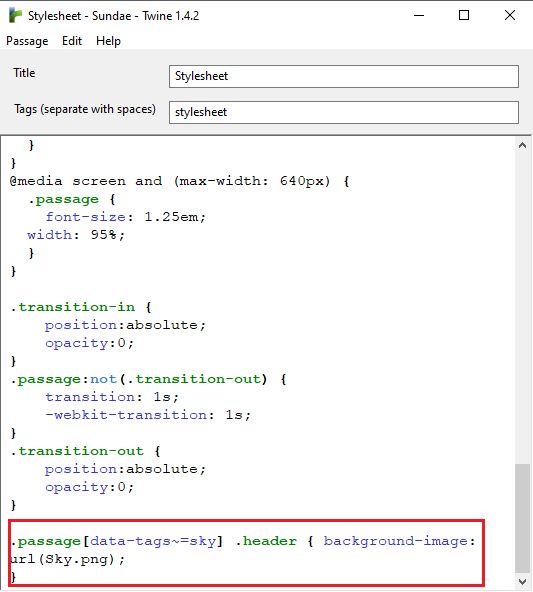
Next, you’ll pay attention tot he CSS in your stylesheet…more or less. See this part?
You’ll need to copy and paste this for EVERY single image you’ll have in your game because each one will need a tag and a link/reference to that image. “data-tags~=” is for naming each picture. So I had a picture of the sky, but if I had a halloween scene I’d name it that. You can use whatever names you want but no two can be the same and they should all be in lowercase. the “background-image” portion is where you tell twine where that image is located. In the new twine it’ll be a url somewhere on the web. In 1.4.2. you upload the image directly into twine.
Lastly, this is what you’ll do for your scene -
For the passage where an image will be you tag it like this:
If you are using 1.4.2. then you’d mix the tag system I just shared with you with the example from the trainwrecks website. something like this can be achieved:
Which is what I’d do for a passage where a character named Lisa appears in front of the sky background. If I wanted to just have Lisa I’d remove the comma and Sky image portion. I hope that makes sense! It looks like the instructions for the template aren’t like they used to be.
Thank you so much for this indispensable answer. I did quite a bit of fiddling last night and it was the dot tags that were really throwing me off. This answer helped me make the instructions on the original CSS a lot clearer and I got it to work in Twine 2
This likely seems a little clunky with the set sizes etc. but I’m pleased to have made something for the first time. Not sure why I posted it but just want to thank you! I’m working on the link highlights now. :–) Thanks again. Hopefully, I don’t need to resurrect this thread for it going awry!