Is there a way to change the line height on a specified block of text?
I can see that you might be able to use use
tw-story{line-height: 1.5em;}
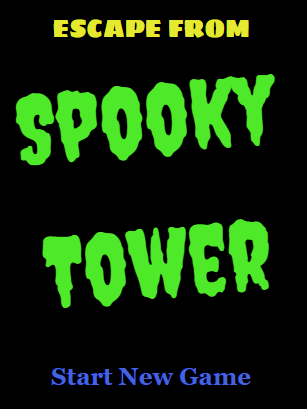
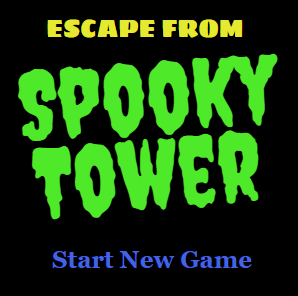
to globally change this, but my situation is I have a title, spread over two lines, and I just want have some control over how closely those two lines sit together. Everything ese is pretty much fine.
I took a screenshot, but apparently I can’t embed images in a post - so I have to hope what I am describing makes sense.
Is there an existing macro that could be used to do this?
Is there a better approach I could take?
Apologies if I am missing something obvious! The excellent help I have received so far is clearly just encouraging me to post more queries
Edit: Oops! I got confused. If you want to globally edit CSS in the “Story Stylesheet” in Twine… Harlowe uses h1, h2… to h6 headers. You can edit them in the Stylesheet…
(css: "line-height: 1.5em;")[LET THERE BE LINE-HEIGHT!!!]
Ah ha! I was peripherally aware of the (css:) macro and was wondering if it would apply to this circumstance! The good news is it does… kinda!
This will be a great tool to have in my back pocket as if I understand correctly, I can get in and mess with some of the ‘stylesheet’ variables on a case by case basis if needs be.
The catch is that in this instance - I need to bring two lines much closer together than they are by default… and as it turns out it doesn’t look like css will allow you to define line spacing lower than 1em. According to a stack overflow article I dimly understood, it looks like I can make them further apart with this technique, but can’t bring them closer together.
I have looked at (floating-box:) as a possible workaround, but the positioning is too crude, and:
Since it is “floating”, this box remains fixed in the window even when the player scrolls up and down.
So I’m a bit stuck at the moment - perhaps I’ll ultimately need to upload a graphic as a work around!
Re: defining headings in the stylesheet - good to know! I was wondering about that too!
Yeah, funny thing about not being able to add images, I’ve tried pasting from the clipboard a couple of times, and it let’s me do it, but when I go to post, I get a popup:
An error occurred: Sorry, you can’t embed media items in a post.
Similarly, if I try to include a web link, I get
An error occurred: Sorry, you can’t include links in your posts.
I assume this is a security thing as I am a newer user??
This badge is granted when you reach trust level 1 … New user restrictions have been lifted; you’ve been granted all essential community abilities, such as personal messaging, flagging, wiki editing, and the ability to post multiple images and links.’
Josh’s suggestion should work for your title text.
I never knew about that line-height restriction, TGB. Thanks for bringing that to my attention. The only thing I could find that kind of works for that is to…
display: inline-block;
line-height: 0.5em;
…the only stipulation is that the element’s text won’t wrap under the other element it’s beside (it will wrap, but only as a whole chunk), but it will wrap within itself just fine while ignoring the parent’s line-height style. Normally, elements use display:inline or display:block as their default setting, but inline-block is great for situations such as buttons stacked side-by-side that have multiple lines of text in them.
Hi @JoshGrams sorry to say I’m not getting any love from this solution. It doesn’t seem to be having any noticeable effect using either positive or negative em values.
The code I am trying looks like this - it’s got the extra markup as I am using collapse whitespace brackets. It’s also got a ridiculously high em number as I was just testing for a response:
…but it still seems like I’m stuck with the same problem. Line heights lower than 1 seem to be ignored …have I missed something in my implementation? Thanks!
This should cause the lines to overlap exactly over one another so you’ll want to adjust the line-height. You can’t use negative line heights, only zero and up.
The reason your code wasn’t working is that SPOOKY had it’s own line-height from Harlowe’s CSS, separate from TOWER. Now they share the same line-height, in the same HTML/CSS element and can work together.
You don’t even need to use the (css:) macro actually. You could do the following…
Whilst the (css: "margin-top: -2.5em;") macros weren’t doing anything on their own, I found that if I combined them with a (box:) macro, we started having success! eg:
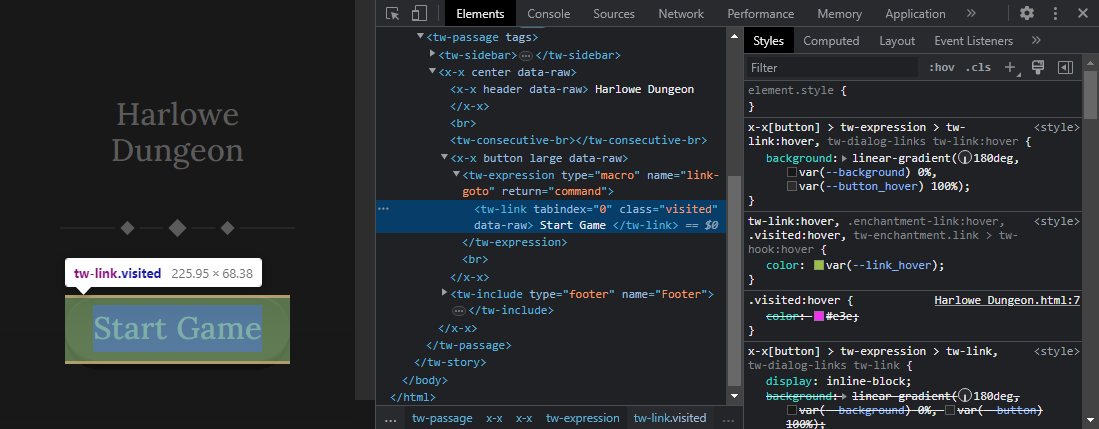
You might or might not be doing this already, but using the inspector (right-click on an element – or hit ctrl+shift+i) in Chrome or Firefox is key to understanding how to apply custom CSS to Twine stories. This is because Harlowe (and other story formats) have their own way of generating the HTML and sometimes they have there own CSS that might be conflicting or interfering.
This is a sample of my Harlowe story. As you can see, I’ve inspected the Start Game link. Notice on the right hand side that my custom styles in the Story Stylesheet have <style> beside them, but Harlowe CSS has ...html:7. I can see that I’ve overrode the Harlowe .visited:hover violet colour with my own green colour.
This technique will allow you to understand why certain CSS works in some situations, but not in others.
Anyway, just sharing some super secret, government black-ops, advanced tips from the trenches.
Fun Fact: If you ever have an issue with Harlowe actually overriding your specific styles, use !important at the end of your style parameter. Use it only when necessary though because it stops all other changes to that style attribute.
@HAL9000 - taking advantage of your super secret, government black-ops, advanced tips I’ve also managed to successfully implement some of your earlier advice too!
Remember how for some reason (css: "line-height: 0em;")[] wasn’t giving me any joy, but (css: "line-height: 0em;")+(text-rotate: -0)[] was? Well on closer inspection, the HTML created by the second approach includes display: inline-block; where as the first does not.
Also works like a charm, like you said it would. The problem, when I was initially implementing your advice, was that I was applying it only to the second word, instead of both words - as per your advice from 27/03 :
The reason your code wasn’t working is that SPOOKY had it’s own line-height from Harlowe’s CSS, separate from TOWER.