An author's reference for Bisquixe, a tool for adding audiovisual content to Inform projects (up: final (?) comments on Cloak of Darkness)

Restoring Images to Released Inform Websites

An unpleasant surprise

We have gathered our image files and declared them properly within our project. Our project includes this sentence:

release along with a "bisquixe" interpreter.

All is in readiness, so we click the release button within our development environment.

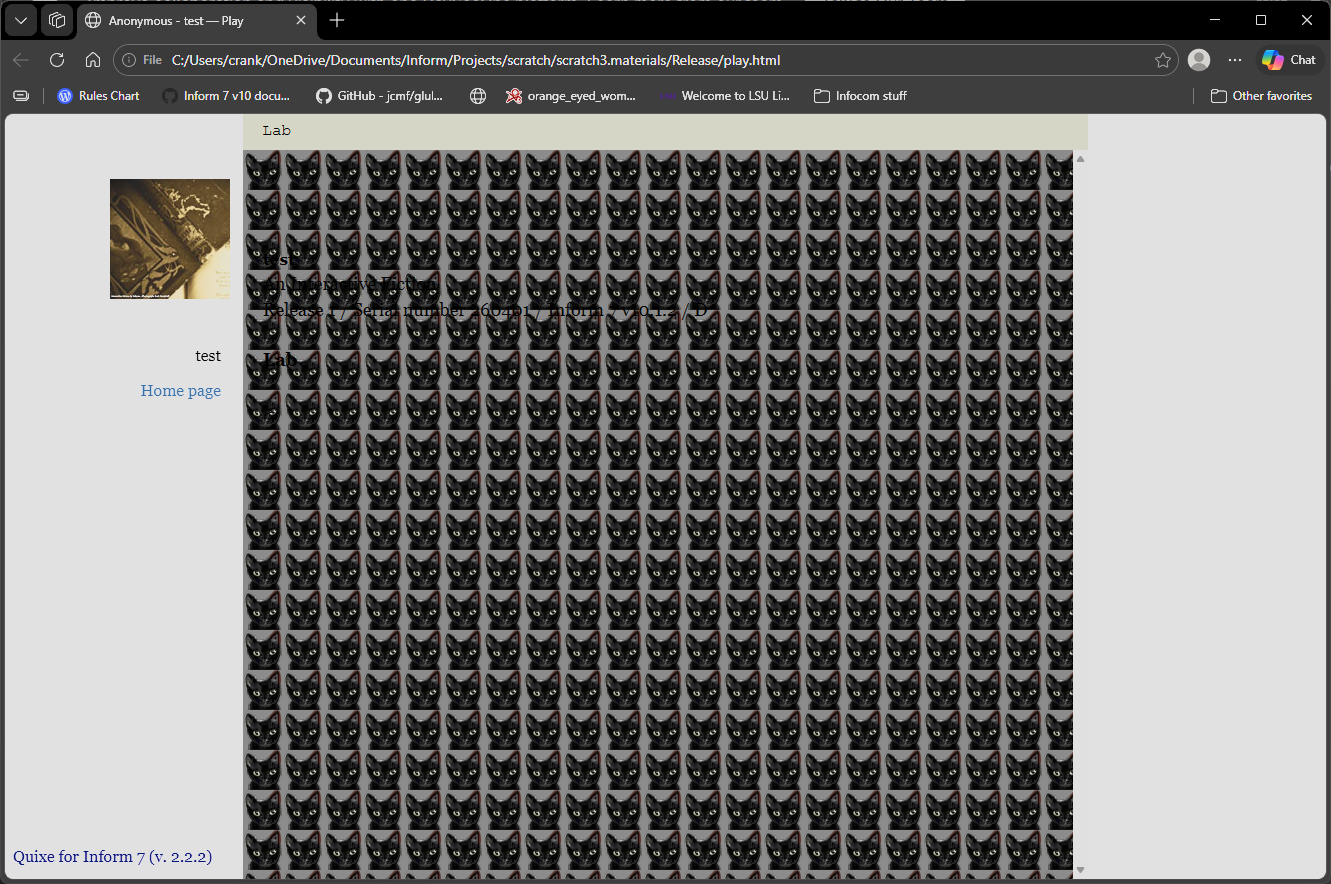
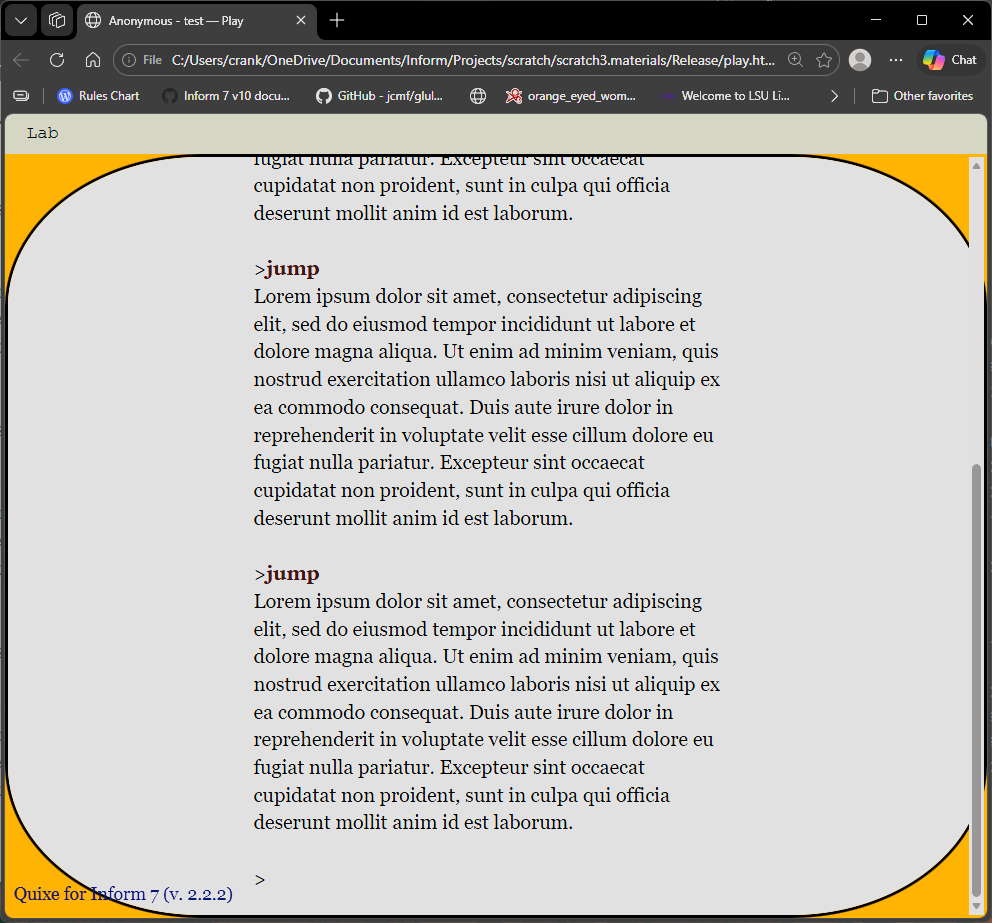
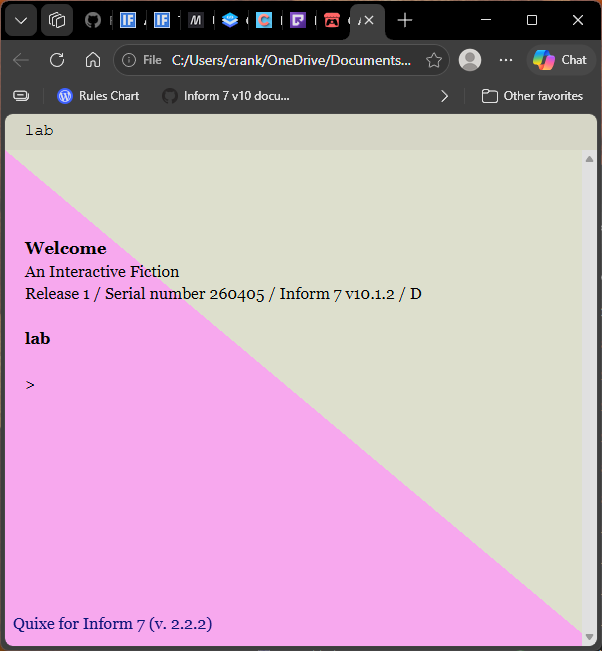
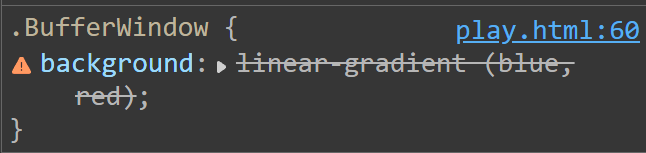
Soon after, authors will be dismayed to discover that Inform has stripped all images from their web release. There is no warning or notification stating that this has happened. There is no toggle by which we can control this behavior. There is additionally no mention of this feature within the documentation.

To be clear: this has nothing to do with Bisquixe. Any Inform project released as a website will be stripped of its multimedia content. This only happens with websites, so GBLORBS will still reflect our artistic intentions.

While these omissions might provoke discussion, let’s hope that Inform 11 will be a brighter day. How can we restore what has been taken away? There are two options for Bisquixe users.

Option 0: Parchment sitegen

Some readers might find this page while searching the forums for a solution to their missing images problem. For their benefit: if you are not using Bisquixe or custom CSS, it is easy to produce a single-file website from a GBLORB file. Simply use the below website:

Parchment Site Generator

pros:

  • simple and foolproof

cons:

  • not compatible with this guide
  • CSS within the file is hard to modify

Parchment sitegen is a great option for people who want a website without the overhead of customization.

Option 1: Using Bisquixe

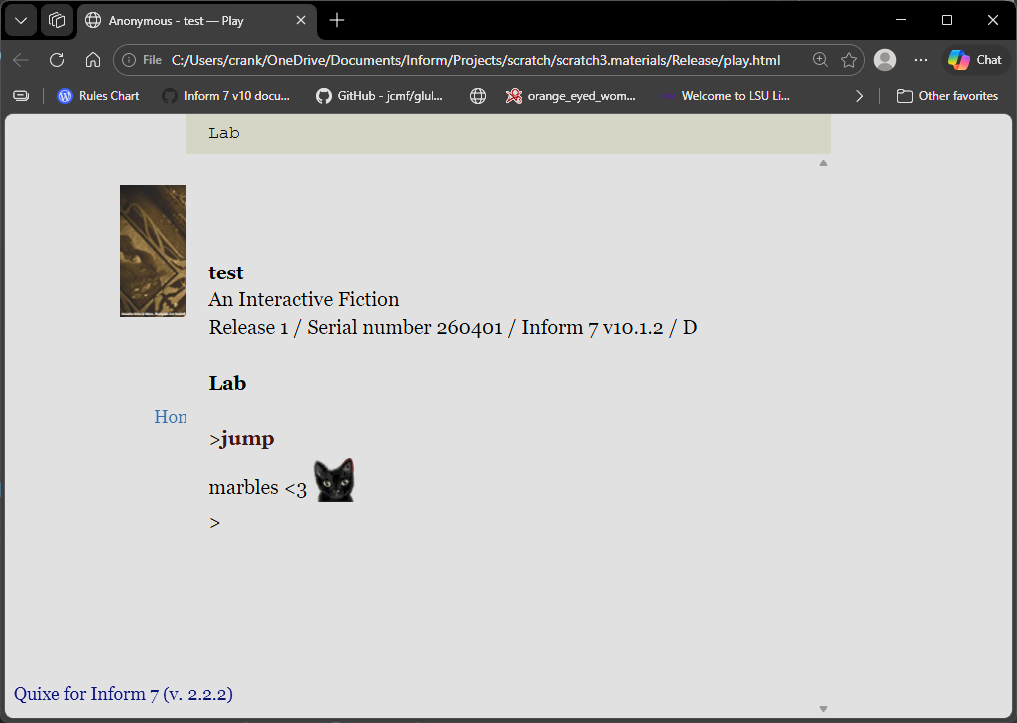
Since Bisquixe interacts with our web page’s html, One option is to use Bisquixe to add pointers to image files that we can release with our web page. In other words, we can tell our project where to find the missing images. As long as we have them in the right place, all will be well.

This tactic uses the Glulx resource ID value discussed within the previous post.

We start by adding images to our project according to the documentation.

figure madame matisse is the file "mmatisse.jpg".
figure icarus is the file "icarus.jpg".

They must be displayed according to the documentation.

when play begins:
	display figure madame matisse;
	say line break;
	display figure icarus;

So far, we have not done anything new. Everything is just as the documentation directs. This is the point at which we intervene with Bisquixe code, using the Glulx resource ID. We never need to know what the ID is; we just need to associate a variable with it.

	let [a variable name we choose] be the glulx resource id of [figure name];

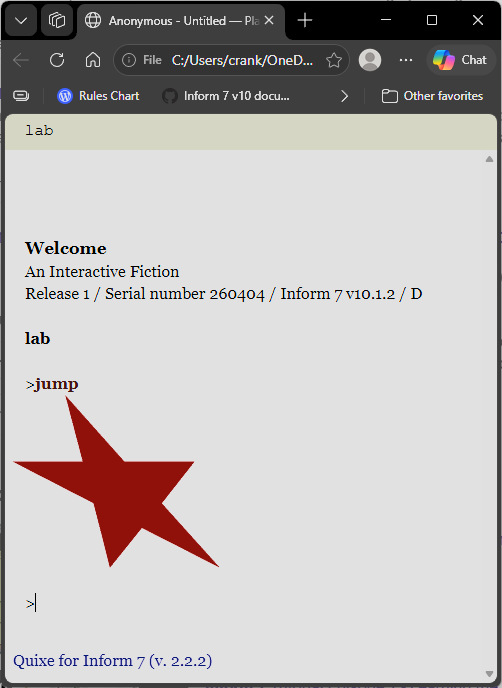
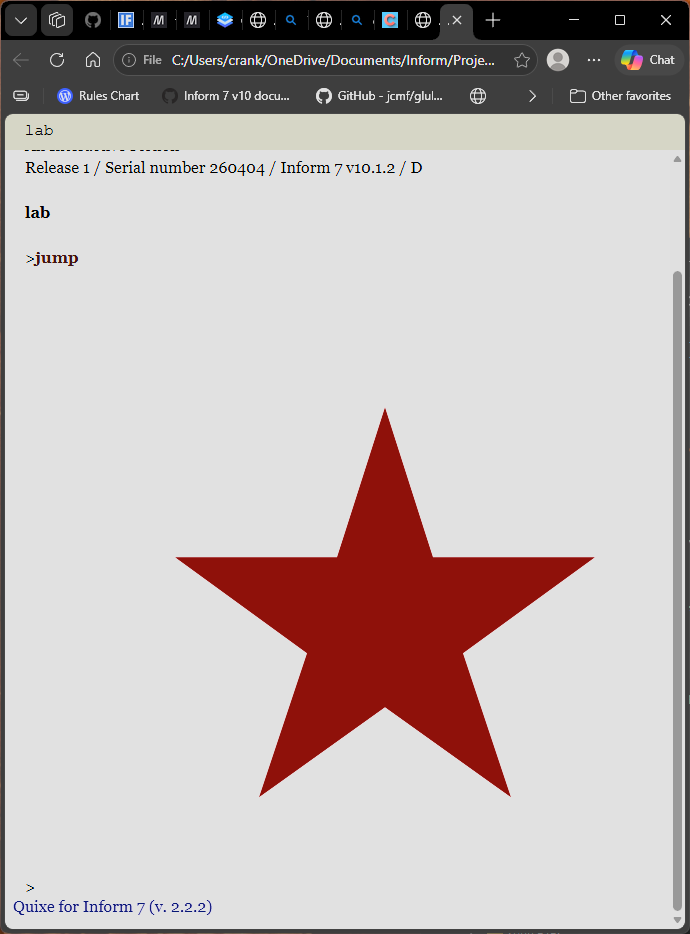
For instance, we could decide that we would like to refer to figure icarus as icarus-ID.

	let icarus-ID be the glulx resource id of figure icarus;

Once we have a variable name for the relevant glulx resource ID, we can tell our project how to find the relevant file. This is accomplished by an add-image phrase. This is code enabled by Bisquixe. The format is as follows:

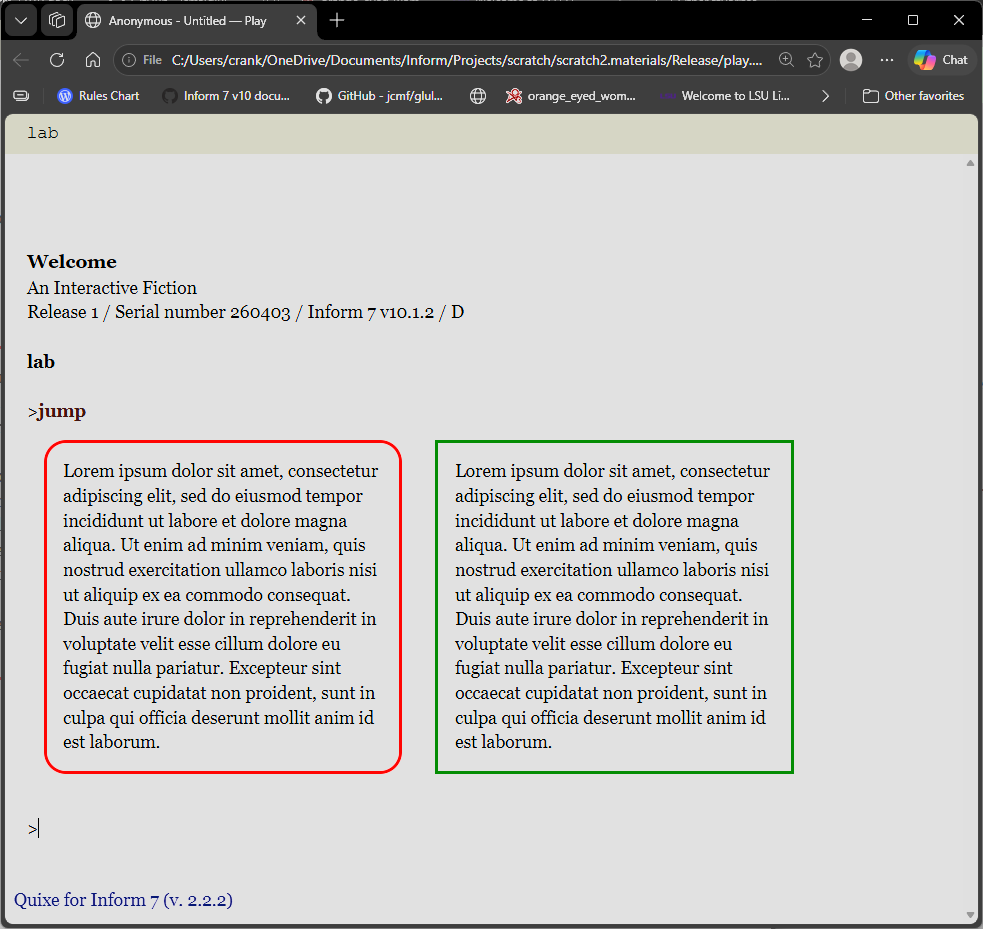
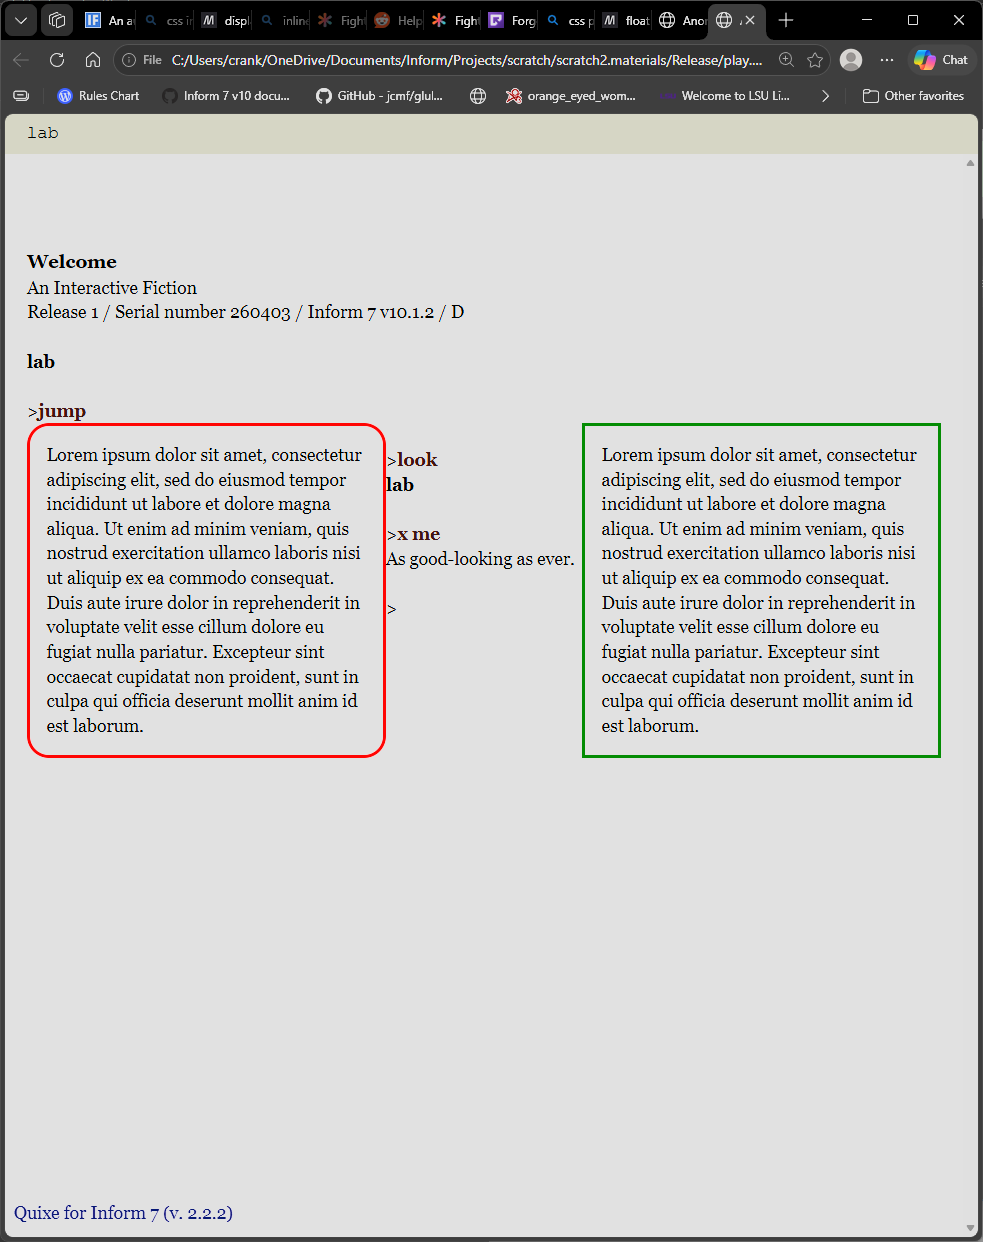
	add-image "[actual file name]" with alttext "[custom alt-text for image]" with id [variable for the relevant Glulx ID] with width [image width: a number] with height [image height: a number]";

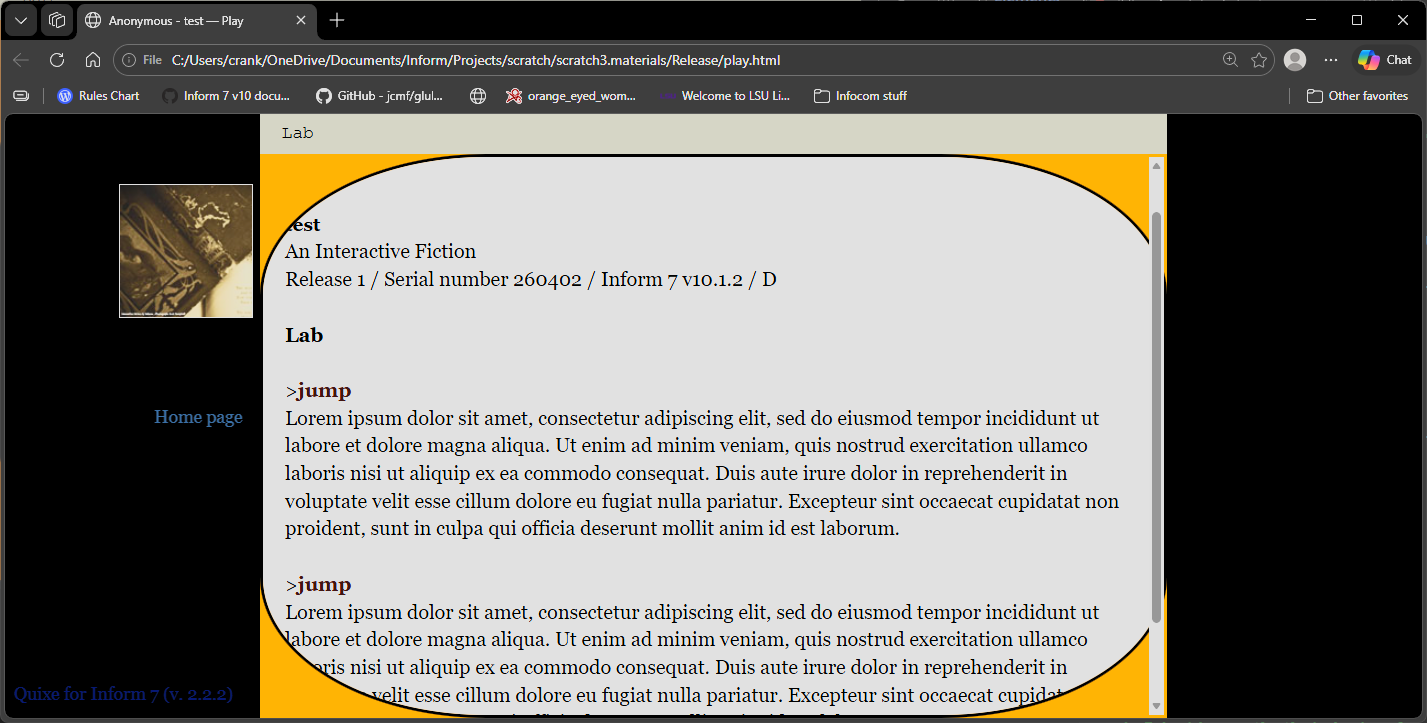
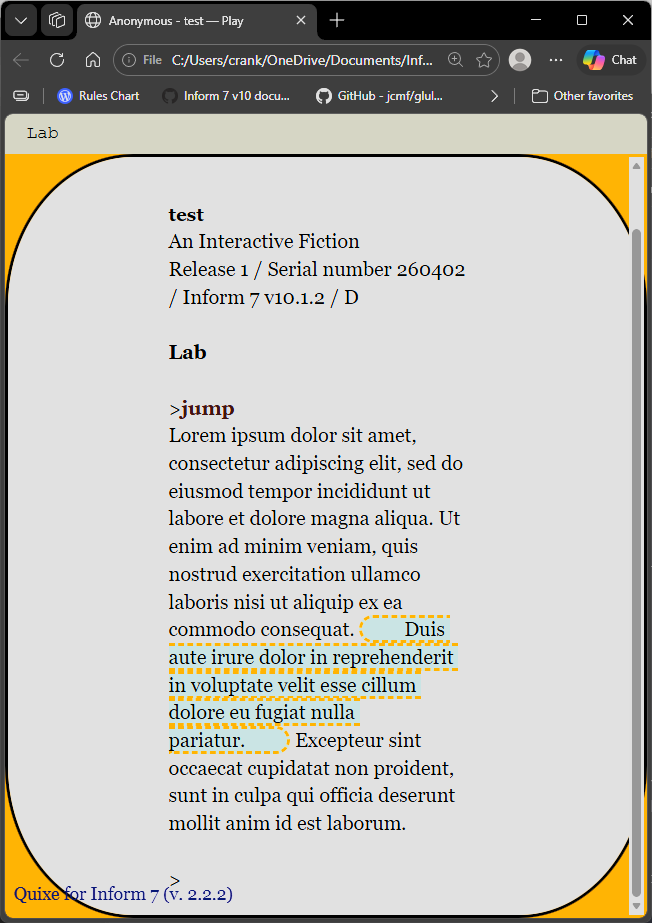
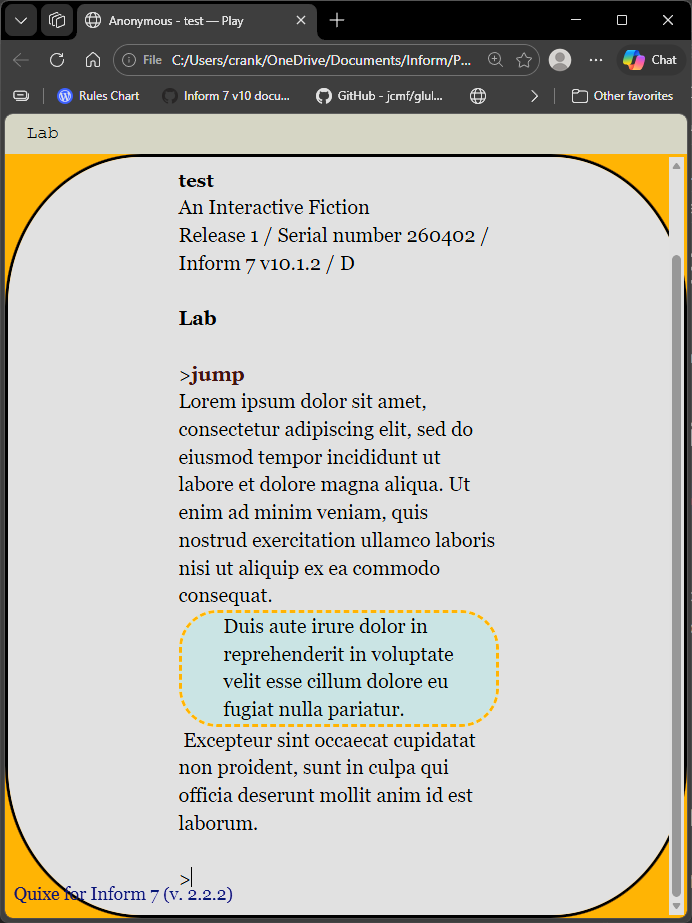
There’s a lot to take in, here. Note that everything is required. Our project will not compile without image dimensions. We can change those dimensions; perhaps we wish to halve them for a smaller footprint. However, images can appear distorted, stretched, or blurry when these values are changed, so authors must take care.

Since our website as-released does not include the image files, we will have to make sure they are available. Images specified in a Bisquixe project are expected to be in a Figures folder within the Release directory. In practice, this is as simple as copying the Figures folder from our Materials directory, since that should contain all that is needed.

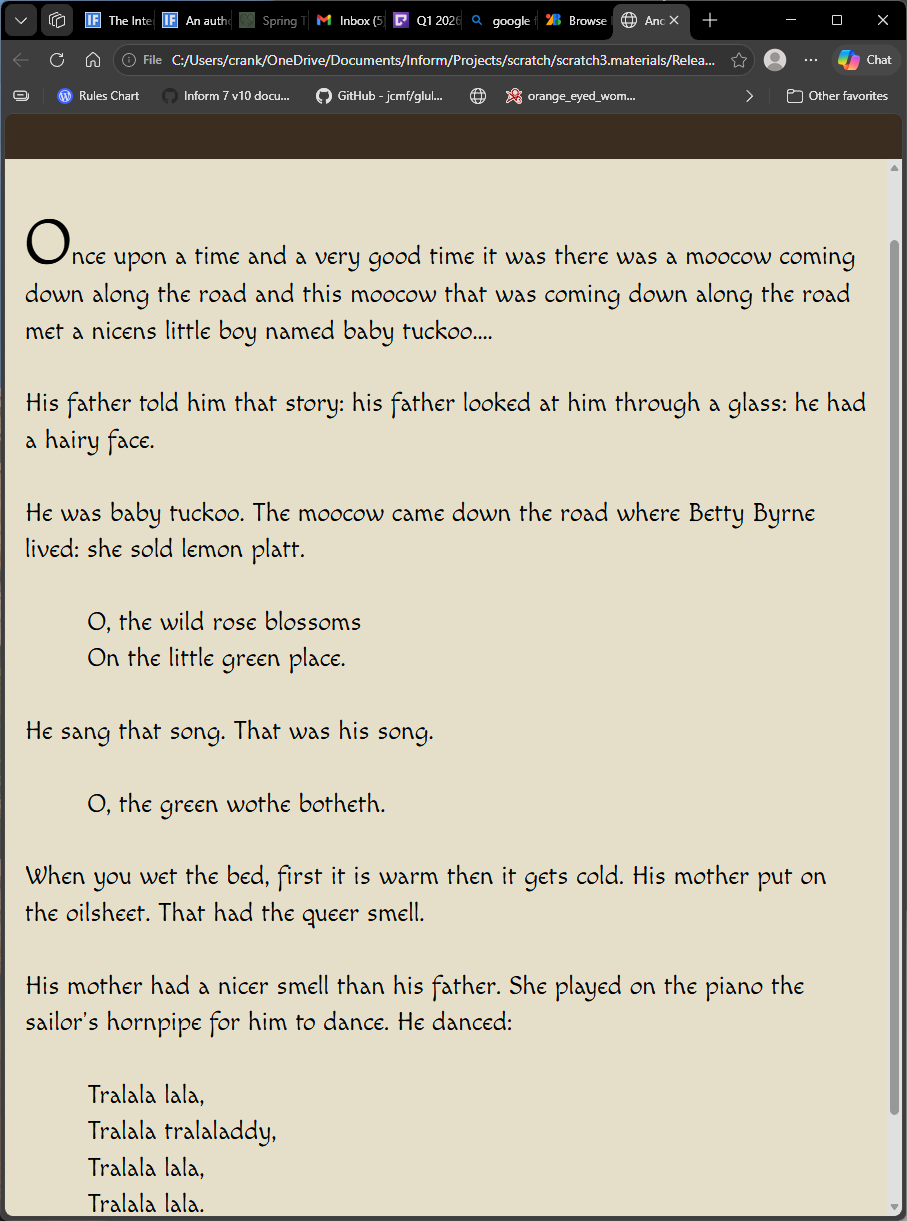
A Simple Demonstration Project
"test"

Lab is a room.

include simple multimedia effects for v10 by mathbrush.
release along with a "bisquixe" interpreter.

figure madame matisse is the file "mmatisse.jpg".
figure icarus is the file "icarus.jpg".

When play begins:
	let icarus-ID be the glulx resource id of figure icarus;
	add-image "icarus.jpg" with alttext "A figure falling from the sky." with id icarus-ID with width 579 with height 874;
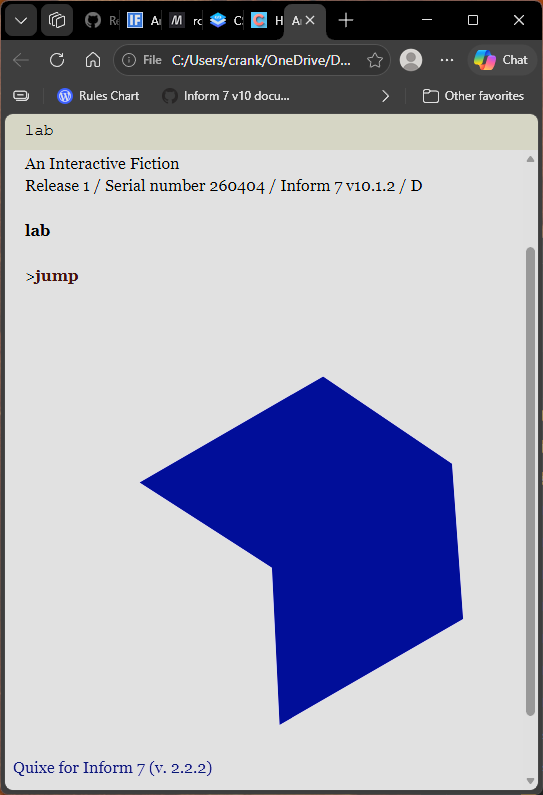
	let madame-ID be the glulx resource id of figure madame matisse;
	add-image "mmatisse.jpg" with alttext "An intriguing woman." with id madame-ID with width 480 with height 600;
	
when play begins:
	display figure madame matisse;
	say line break;
	display figure icarus;

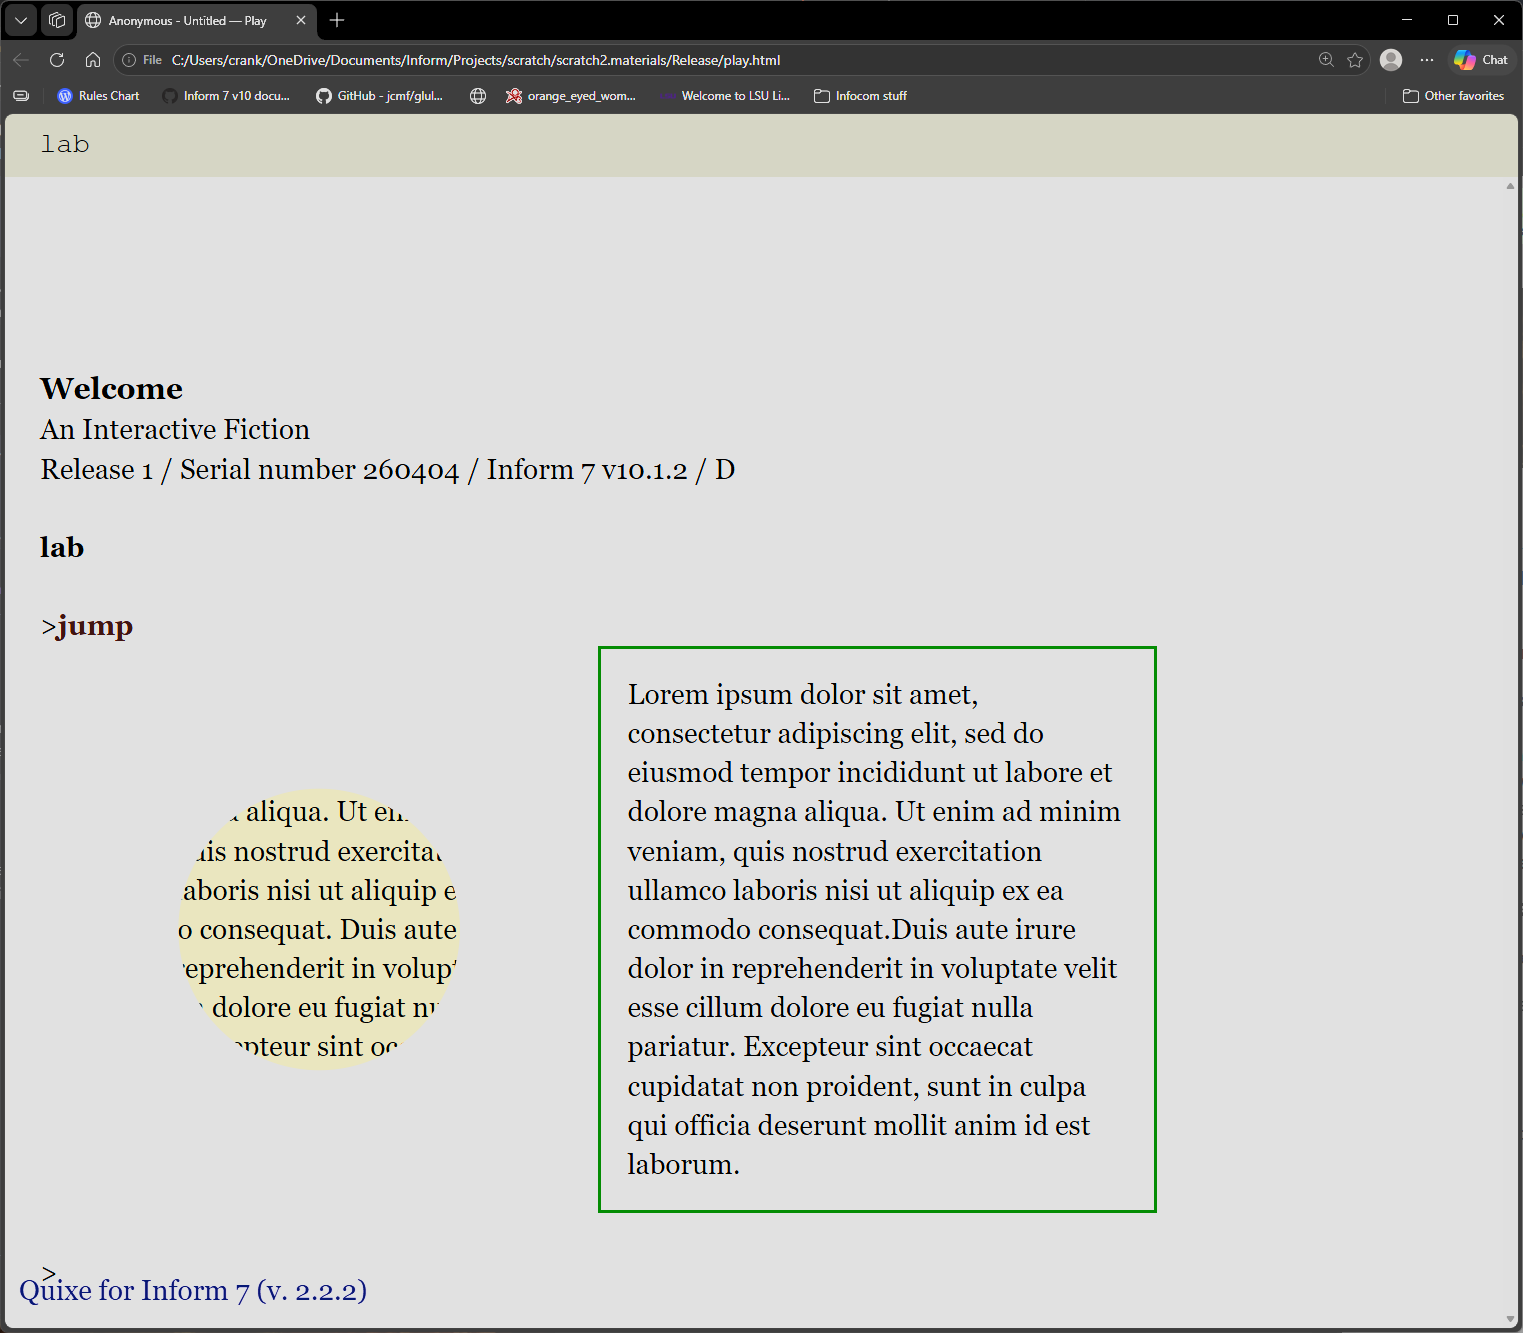
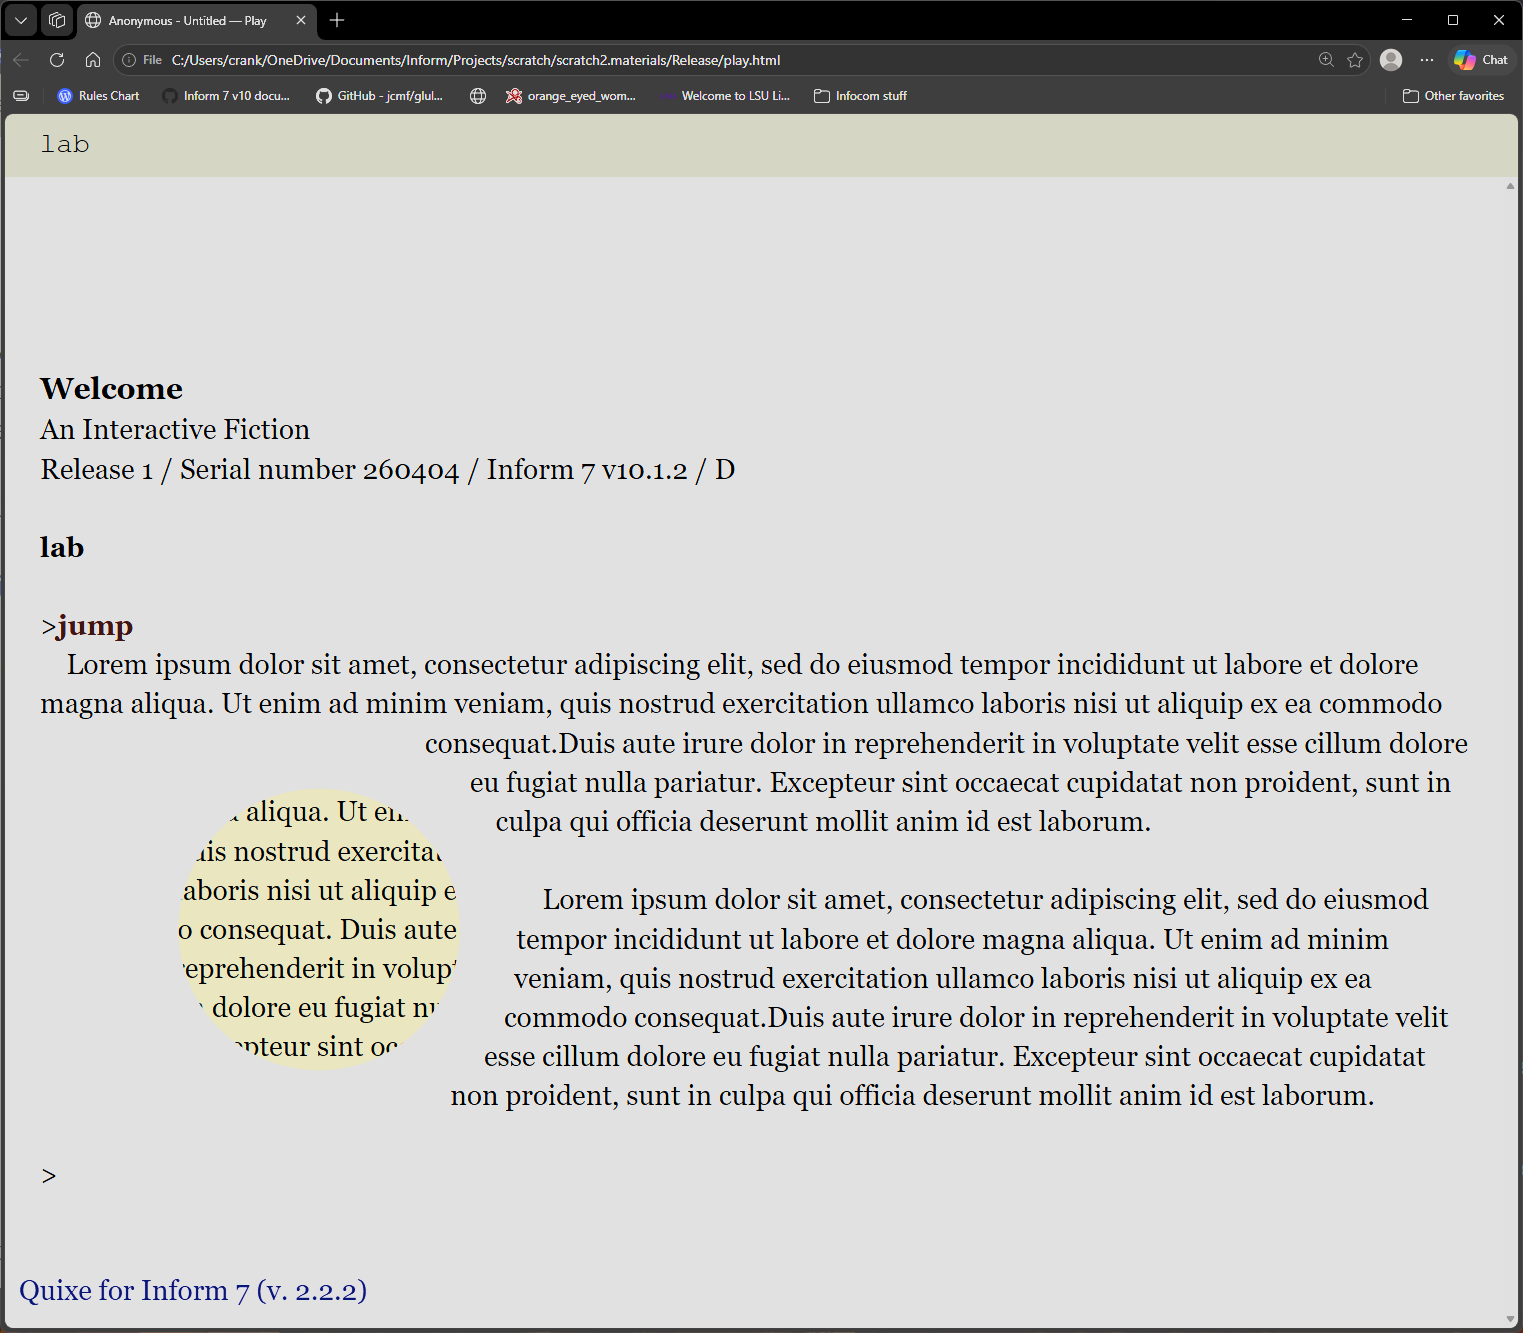
Note that there are some opportunities to manipulate image scaling and dimension via variables, so things like

to decide which number is the image width of (n - a figure name):
	if image shrink is true:
		decide on 579;
	otherwise:
		decide on 700;

are possible.


pros:

  • ability to manipulate image dimensions dynamically
  • can further customize output using variable figure name values
  • code format is highly readable

cons:

  • adding two lines of code for each image might become cumbersome
  • added overhead of managing image files for release

Option 2: ifsitegen.py

Rather than modifying our project, we could seek out an alternate release method: ifsitegen.py. Many authors will find that there is an initial learning curve, but overall effort is lower in the long-term.

Ifsitegen.py uses our Inform installation files, but it does not require that we do anything within Inform, or even that we have it running.

The script will use website and interpreter templates to build a website out of our GBLORB file. Since the script uses relative pathing, everything should “just work” if we gather the needed files. First, create a directory that we will use for making releases. It should contain the following:

  • website template as a .zip file
  • interpreter template (Bisquixe) as a .zip file.
  • our GBLORB file
  • the script itself, ifsitegen.py
  • cover image file, if any

Additionally, we will need a current version of Python. Get it here:
Download Python | Python.org

How do we secure zipped versions of website templates? Unless we have built some of our own—in which case we know where to look—we seek the “classic” and “standard” website templates from our Inform installation directory. The standard template is the default; it will be most familiar to players and authors.

The template should be in a zip file called, for instance standard.zip, and the files within should be there. More specifically, they should not reside within a folder or folders inside the .zip, but should instead be immediately visible within the .zip file. We can find those templates here (Windows):

\Program Files\Internal\Templates

or, for Mac

/Applications/Internal/Templates

If we are following this guide, we have already downloaded the Bisquixe interpreter. We will need that as a .zip file, too.

The script generally can find these things on its own, but authors will usually be glad that they are maintaining their release environment as a “one stop” destination.

It’s time to run the script. We open the window containing all of our needed files, and then we open a terminal window. In Windows, simply right click the open window and select Open in Terminal. Mac users can find system-specific guidance here.

However we get there, the formatting of the command is straightforward. If we want to review general help, we can simply enter python ifsitegen.py to review formatting and options. If we already have our files in one place, our work should be very simple. This command can be used as a template:

python ifsitegen.py -w "[website template like standard.zip]" -i "bisquixe.zip" --title="[your game title as it will appear at the top of the page and side links]" --author="[author name as it will appear at the top of the page and side links]" --cover="[your cover art file]" "[file name of your game file, complete with .gblorb extension]"

If all is in place, a “release” folder will be created that contains our website, images and all. Note that not everything in this script is required. If we are testing, there is no need to specify author, title, or cover art. In fact, we many never have cover art to specify. All we need to test our game is to specify a website template, an interpreter template, and a game file.

This should work fine, for instance, provided that all of the needed files are in place.

python ifsitegen.py -w "standard.zip" -i "bisquixe.zip" "test.gblorb"

If we keep our terminal window open, we can simply repeat our command with arrow keys rather than typing everything once more.

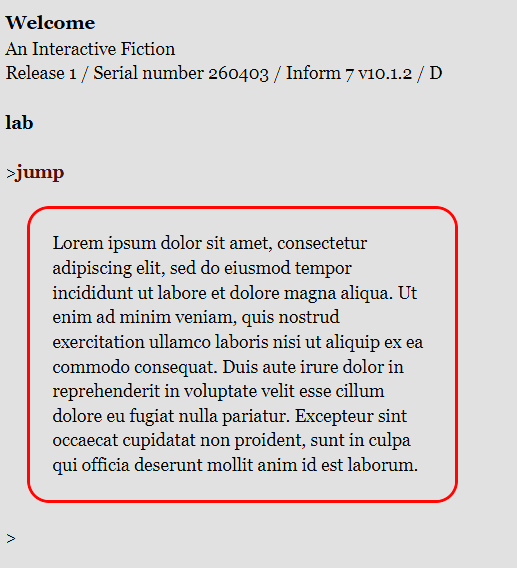
In all respects, this solution will mimic Inform’s behavior within a game file, more or less, though we can still present web-specific images using the if bisquixe is supported condition from post number 14.


pros:

  • able to refer to images in-project consistently between GBLORB and website deployments.
  • no additional code
  • single method across all projects

cons:

  • less flexible
  • reliance on external tools
  • initial setup with Python and template files will be daunting for many

The Bottom Line

Restoring or releasing a website with images requires added work, but authors can choose which approach is best for them. The decision is ultimately one between handling the problem during or after release. While there is no known release date for Inform 11, it is very safe to assume that we will no longer need to take such steps when that day comes.

In any case, authors will have different levels of experience and comfort with the different techniques available, so this reference is meant to inform rather than to advise.

2 Likes

Working with Sound

To implement sound in an Inform game is to walk a barely worn path. This is not because sound adds nothing to parser games! Indeed, authors have used sound and music to great effect.

One challenge is that sound is temporal. We experience it as something in motion, but parser games almost always wait for the player’s input. There can be a disconnect between atemporal play and temporal sensory information.

A sound effect can afford a “jump scare” effect, coming as it might seem out of nowhere. Because so few parser games use sound effects, we do not always expect them. Consider, for instance, a hypothetical game that is silent for 60 minutes of play before playing a loud, crashing sound. It would be unkind to put a player through such a thing.

These are design challenges that should not discourage the use of sound altogether. Everything in an Inform game presents a design challenge! The question this reference must answer is this: how can they be implemented?

Documentation review

Inform’s documentation has little to say about sounds. If we have used images with Inform, we will find the process familiar. First, we declare our sound files. Just as we do with images, our sentence associates a sound name with a file name.

sound goldberg is the file "11_Goldberg_Variation_8.ogg".

Our sound name must begin with the word “sound”. While an IDE may not be too strict regarding file types, Inform’s release machinery will only permit the following file extensions: .ogg, .midi, .mod, and .aiff.

Here, a problem arises. Safari on iOS will only support .mp3 format with Bisquixe. A workaround will be discussed later, but it is always worth asking if the author intends to support mobile web browsers. Whatever the author decides, authors should be aware that .mp3 support will require extra steps.

Once the sound name is associated with a file, authors can play it during the course of any rule. The phrase begins with play:

before jumping:
	play sound goldberg;

Using Daniel Stelzer’s Music extension

We can add more features via Daniel Stelzer’s “Music” extension.

include music by daniel stelzer.

Not all of features of Music are supported by Bisquixe.

  • loop [sound name]: supported; play a sound in a loop.
  • stop [sound name]: supported; immediately end playback of a sound.
  • fade (see extension for details): somewhat supported; timer behavior sometimes feels off.
  • crossfade and introduce: does not work at all and will likely crash Bisquixe. Do not use.

Using Bisquixe and working around problems

At this point—this is not completely necessary—I recommend editing the Simple Multimedia Effects extension to permit multiple file types. Search the extension for the to upload-audio definition:

To upload-audio (Temp - a text) with internal name (Temp1 - a sound name):
	let tempid be the Glulx resource ID of Temp1;
	let tempname be "[temp].mp3";
	add-audio tempname with id tempid;

and replace it with this code:

To upload-audio (Temp - a text) with internal name (Temp1 - a sound name):
	let tempid be the Glulx resource ID of Temp1;
[	let tempname be "[temp].mp3";]
	let tempname be "[temp]";
	add-audio tempname with id tempid;

While authors should be aware of iOS support and file formats, making this change will leave the question of iOS browser support in their hands.

Just as is the case with image files, Inform will strip all sound files from our project. We can run ifsitegen if we like, but that won’t be enough. Why? We will discuss this further in a discussion about interpreters and portability, but, for now, it is enough to point out that Quixe, the interpreter upon which Bisquixe is built, does not support sound in any way. Without using Bisquixe-specific code and features, our web page will have no means of handling sound resources and code.

In fact, using ifsitegen.py to restore sound files to our project without corresponding Bisquixe code will likely crash the interpreter. That being so, our next step whether we run ifsitegen.py or not will be to associate each sound file with the appropriate Glulx resource ID. This is the required format, using an upload-audio phrase:

	upload-audio "[file name]"  with internal name sound [sound name];

So long as a sounds folder containing all of our named sound files exists within the release directory, our audio files should play correctly.

Supporting “unsupported” file formats

Since our Bisquixe project is accessing external sound files through a browser window, Inform’s internal support requirements do not always apply. In fact, they can be overcome at will:

  • Declare a sound file within inform to generate a sound name and Glulx resource ID
  • Maintain an external directory of sound files for our game to access
  • Use Bisquixe to associate the project’s sound name and Glulx resource ID with our files, .mp3 or otherwise.

To get an mp3 into our Bisquixe project, in other words, we need to declare a supported file name. The file isn’t really important, as we just need a valid sound name to work from. We can get away with this, for instance:

sound dog is the file "0004086.ogg".

when play begins:
	upload-audio "blargh.mp3" with internal name sound dog;

In order to release our project, we need a file named 0004086.ogg in our /Materials/Sounds directory. For our project to play sound dog in a browser, we need a file named blargh.mp3 in the /Release/Sounds directory.

This is a lot to take in! A combination of factors (variable platform support, Quixe sound support, Inform’s file format requirements) set before us a complex and hard-to-traverse landscape. This is entirely understandable. Many games featuring music and sound are authored in Vorple, a more sohpisticated multimedia option for Inform authors. Some authors are able to write their own sound extensions. As for the rest of us: sound seldom comes up, as a search of intfiction.org will confirm. In the absence of ongoing technical discussion, it is hard to know what authors and readers seek.

This is all to say that, through no one’s fault or neglect, many of sound’s edges go unsanded. Authors hoping to make heavy use of sound and music in their Inform projects will likely require both courage and curiosity. These challenges also mean that works using sound and music stand out all the more, and that their successes are impressive indeed.

Blockquote

3 Likes

More on Interpreters

At the time of this writing, Bisquixe does not scale images to a window. I can personally confirm that Gargoyle, Windows Glulxe, and Quixe/Lectrote all do. It is on the radar for Parchment/iplayIF. [if you are a Spatterlight user and can comment on this, please PM me and I’ll update this post]. These interpreters are likely the five Glulx interpreters with the largest footprint, but there are many more out there.

The Glk specification was updated last year to include image scaling. It is reasonable to assume that your game’s graphics will work many places—web, GBLORB, or otherwise—but they assuredly won’t work everywhere. An interpreter that is no longer maintained, for instance, will not be compliant with the latest Glk spec.

This is not a criticism of any platform or platform developer. All of these technologies are labors of love performed by people in their free time; they are gifts. However, we authors do need to understand that, should we release a GBLORB story file, we cannot guarantee what that game’s experience will be like.

If we release a standalone story file with images, we have two options. We can accept that some players will experience our wide images as being clipped off at the right edge of the game window. We can otherwise include small images that will hopefully fit on any (non-mobile) screen.

Similarly, we may compose music for our games. Not all interpreters will play it. Bisquixe does not support cross-fades, but Parchment does. And so forth.

An advantage of releasing a web-playable game is that we can guarantee through testing the behavior of a single, chosen interpreter, whether that be Parchment, Quixe, or Bisquixe. Taking the plunge into audiovisually rich Inform games carries with it added complexity and risk.

While this sounds darker than I intend, it is generally true that reviewers review games rather than interpreters. The more authors diverge from a plain-text only design, the more possible it is that they might receive feedback regarding an interpreter’s handling of small play windows, for instance. This is not a critique of players, of course, but we authors should be clear-eyed about the very complex reception context of parser games.

Even though not all web interpreters scale images at this time, we have options for adding such support ourselves. This will be discussed in a later post.

3 Likes

More commonly styled CSS properties

So far, we have covered the CSS elements required to style a basic web page. What if we want to go farther? Authors will be surprised and presumably happy to know that many standard properties can be specified with minimal effort using only the css-set-fast phrasing we have already learned.

As we begin to explore the possibilities, possibly clicking about at W3schools or Mozilla Developer Network, we should think of two possible opportunities: styling entire elements, such as .BufferWindow, and applying custom styles via text substitutions.

We should also think about how we can use these features dynamically. Bisquixe allows us to change our game’s CSS at any time. We can even change it conditionally in the middle of a text!

In this part of the guide, some commonly styled properties will be reviewed. This is not yet a recipe book! The focus here will be on functionalities and opportunities (though worry not, the recipes are coming).

4 Likes

background-image

The background-image property is a powerful instrument—for good or for ill! Most obviously, we can use it to apply a background image to any specified element or class. This sort of application is simple to enact. If we want to incorporate a specific background image for the .BufferWindow, it’s as simple as this:

this is the BufferWindow background rule:
	css-set-fast ".BufferWindow; background-image; url('marbles.webp')";

Because Bisquixe usually uses relative pathing, this example will look for a file called “marbles.webp” in the same directory as our index.html file. For housekeeping purposes, we might rather keep CSS images in another folder called “figures.” That’s easily done!

	css-set-fast ".BufferWindow; background-image; url('Figures/marbles.webp')";

Whenever our project executes the required css-set-fast phrase, background-image will be assigned the relevant value.

By default, the image will repeat as needed to fill the entire space. With smaller images, this can create a “tile” effect.


The above example is impossible to read, and I hope it illustrates the risks involved in specifying background images. As always, the key is achieving the right level of contrast between background and foreground.

There are several properties that affect the reader’s experience of a background image, though we will only discuss three here.

  • background-color: if our background image is transparent or has transparent parts, our chosen background-color will show through.
  • background-size: specifies the way that the background should be sized. Note that our background-repeat value should be set after background-size since our CSS is set dynamically based on order processed. If needed, we can set a pixel height or size based on percentage of the screen.
  • background-repeat: we can specify whether or not our image displays once or repeats to fill its container. The default value is repeat. While no-repeat is likely the most common option, the possibilities can be reviewed here.

We can also apply a background image to a specific text or portion of a text. To do so, we first create a style. As always, the name can be anything we choose. I’ve chosen marbles.

to say mClass:
	set-any-class "marbles";

From there, we can specify a background-image, font-size, and background-repeat.

when play begins:
	css-set-fast ".BufferLine; white-space; pre-wrap";
	css-set-fast ".Style_marbles; font-size; 36px";
	css-set-fast ".Style_marbles; background-repeat; no-repeat";
	css-set-fast ".Style_marbles; background-image; url('Figures/marbles.webp')";

This will allow us to use code to apply an inline background. Here, we use this style to fill in empty spaces with a background image.

to say marbles: 
	say "marbles <3 [mClass]     [roman type]";

The result:

4 Likes

border

Elements and in-line texts have borders, but they don’t appear by default. We can change this by assigning a value to the border. For instance:

when play begins:
	css-set-fast ".BufferLine; border; solid";

Will draw a heavy black line around every .BufferLine class as it scrolls down the page.

We could just as easily style parts of a text with inline substitution. Here, we add. background-color and border properties to inline text. Note that we can specify characteristics fo the line, too. In this case, we’ll use a dashed orange line with a lightcyan background-color.

to say cyan:
	set-any-class "cyan";

when play begins:
	css-set-fast ".Style_cyan; border; dashed orange";
	css-set-fast ".Style_cyan; background-color; lightcyan";

If we apply the [cyan] substitution to a text, it should look like this:


As the example demonstates, border-right and border-left properties (here set together as border) do not apply to word wrapping. The border is at the literal beginning and ending of the substituted text, so there is no orange line to the right of “reprehenderit in.” An alternative option is explored below.

border-radius

We can do a lot with borders. Consider the border-radius property, which can turn default sharp corners into curves. We can tweak each corner individually, or apply the same value to every corner at once. The property accepts both absolute values (like 20px) or relative ones (20%). If we make changes to the border of the .BufferWindow, the #gameport underneath is revealed.

when play begins:
	css-set-fast ".play; background-color; black";
	css-set-fast "#gameport; background-color; orange";
	css-set-fast ".BufferWindow; border-radius; 25%";
	css-set-fast ".BufferWindow; border; solid";

produces this:

The default behavior is to simply cut off, or clip, content that exists beyond the border. This behavior can be seen at the bottom of the screenshot. So far as this author knows, there is no elegant way to wrap text along the edges of the custom border of a background shape without editing the HTML. Our only recourse is to define the border-radius and then assign a buffer property that is greater than our border radius. In practice, this can sacrifice a good deal of onscreen real estate.

This could be desirable, of course. It is always up to the author. This example:

when play begins:
	css-set-fast ".play; background-color; black";
	css-set-fast "#gameport; background-color; orange";
	css-set-fast ".BufferWindow; border-radius; 20%";
	css-set-fast ".BufferWindow; padding-left; 25%";
	css-set-fast ".BufferWindow; padding-right; 25%";
	css-set-fast ".BufferWindow; border; solid";

yields this:

We could just as easily apply the border-radius property inline, though these will have problems if we don’t take care. Simply adding this code will yield an unappealing result:

to say text:
	set-any-class "text";

when play begins:
	css-set-fast ".Style_text; border; dashed orange";
	css-set-fast ".Style_text; background-color; lightcyan";
	css-set-fast ".Style_text; border-radius; 35px";
	css-set-fast ".Style_text; padding; 38px";
	css-set-fast ".Style_text; padding-left; 5px";
	css-set-fast ".Style_text; padding-right; 5px";	

Chances are, we were hoping for a box with a single line around it. In order to accomplish this, we will specify display and position properties.

adding

	css-set-fast ".Style_text;display; block";
	css-set-fast ".Style_text;position; relative";

to our project will get us closer to our presumed target.

We could go further. Experimenting with margins and the like will further customize the position of our new box onscreen, but those tactics will receive a post all their own. Likewise, a background can be styled to match a nearly limitless possibility space of shapes.

4 Likes

arrangements

While this is not a guide to web design, there are some core concepts that can inform our work.

The default layout of an Inform game for the web is a vertical sequence of .BufferLine output, but we can use custom classes to bend the rules a bit. If we have carved out a bit of our own space with properties like display and block, we can go further if we assign our custom class a width (the default is the width of the .BufferWindow), a relative position can permit us to place other content alongside it.

consider the following:

when play begins:
	follow the ipso style rule;
	
this is the ipso style rule;
	css-set-fast ".Style_ipso; border; solid red";
	css-set-fast ".Style_ipso; width; 40%";
	css-set-fast ".Style_ipso; position; relative";
	css-set-fast ".Style_ipso; display; inline-block";
	css-set-fast ".Style_ipso; border-radius; 20px";
	css-set-fast ".Style_ipso; padding; 20px";
	css-set-fast ".Style_ipso; margin; 20px";

to say ipso:
	set-any-class "ipso";

These steps are likely familiar by now, but note the use of the inline-block value, which will allow us to not only use this block inline but style buffer and margin properties. relative position makes it possible for the block to land more or less where it will without any direct layout specifications from us. In this case, it will occupy the first available space, which will be on a new line at left.

None of that is terribly exciting. It’s exactly where it would have printed in the first place! Things get more interesting, though, if we define another style.

this is the after style rule:
	css-set-fast ".Style_after; border; solid green";
	css-set-fast ".Style_after; width; 35%";
	css-set-fast ".Style_after; position; relative";
	css-set-fast ".Style_after; display; inline-block";
	css-set-fast ".Style_after; padding; 15px";
	css-set-fast ".Style_after; margin; 15px";

this new custom class, .Style_after, is nearly identical to the first. The border has a different color, but the essential properties (size, margins, and so forth) are the same. Because they are both inline-blocks with relative positioning, we can place them side-by-side, presuming there is enough screen space.

Let’s define some output for testing.

instead of jumping:
	say LI;
	reset-style;
	say P;
	say paragraph break;

to say ipso:
	set-any-class "ipso";
	
to say LI:
	say "[ipso]Lorem ipsum dolor sit amet, consectetur adipiscing elit, sed do eiusmod tempor incididunt ut labore et dolore magna aliqua. Ut enim ad minim veniam, quis nostrud exercitation ullamco laboris nisi ut aliquip ex ea commodo consequat. Duis aute irure dolor in reprehenderit in voluptate velit esse cillum dolore eu fugiat nulla pariatur. Excepteur sint occaecat cupidatat non proident, sunt in culpa qui officia deserunt mollit anim id est laborum.[roman type]";

to say P:
	say "[post]Lorem ipsum dolor sit amet, consectetur adipiscing elit, sed do eiusmod tempor incididunt ut labore et dolore magna aliqua. Ut enim ad minim veniam, quis nostrud exercitation ullamco laboris nisi ut aliquip ex ea commodo consequat. Duis aute irure dolor in reprehenderit in voluptate velit esse cillum dolore eu fugiat nulla pariatur. Excepteur sint occaecat cupidatat non proident, sunt in culpa qui officia deserunt mollit anim id est laborum.[roman type]";


This is only scratching the surface. We can use the position property to further tune the placement of our content, though we will be bound by the general design of the page, some of which is inaccessible to us (or to me, in any case, since it resides in javascript). This is almost always for the best, as there must be some universal givens for games (including ours) to work consistently!

a word on ‘‘float’’

The float property is used to move an element or class to the right or left side of its container. It additionally specifies that nearby content will wrap around it. This can be useful. Perhaps we have one styled content like our boxes below, but we would like the general flow of the game (command prompt, output text), to roll around it. This might be especially useful for wrapping text around images.

However, when floating content, other content not specifically styled can show up in the darndest places. For instance, if we add float; rightand float; left properties to our two boxes, the command prompt will wedge itself between the two!


This particular case is easily mended; we can tell the bufferline to always begin after the last bit of output.

	css-set-fast ".BufferLine; clear; both";

Still, it is good for authors to know that float can be a bit, er, floaty.

2 Likes

manipulating shape and perspective

CSS and HTML boast a varied and powerful feature set for ascribing shape to elements and classes. Their properties involve an idiom different from those we have reviewed to this point. The aim of this section is to direct authors to helpful information while providing a few examples.

clip-path

The clip-path property specifies the visible edge of a class or element. By default, the clip-path matches the given or inherited shape of its container. For instance, if we add a clip-path to our previous .Style_ipso class

	css-set-fast ".Style_ipso; background; lemonchiffon";
	css-set-fast ".Style_ipso; clip-path; circle(25%)";

This is the result:


This is not an ideal way to display text, obviously. Unless we apply a draconian amount of buffer to this class, nearly all of our text will vanish. This is by design. The clip-path property is best used with empty blocks or images.

If we apply float to this shape, and specify a shape-outside property (this should be larger than the clip-path value), we can wrap text around our shape/image/background.

this is the ipso style rule:
	css-set-fast ".Style_ipso; width; 35%";
	css-set-fast ".Style_ipso; position; relative";
	css-set-fast ".Style_ipso; display; inline-block";
	css-set-fast ".Style_ipso; border-radius; 20px";
	css-set-fast ".Style_ipso; padding; 15px";
	css-set-fast ".Style_ipso; background; lemonchiffon";
	css-set-fast ".Style_ipso; clip-path; circle(25%)";
	css-set-fast ".Style_ipso; shape-outside; circle(35%)";
	css-set-fast ".Style_ipso; float; left";
	
this is the after style rule:
	css-set-fast ".Style_after; position; relative";
	css-set-fast ".Style_after; padding; 15px";

will yield this:

If we have increased the default character limit for Bisquixe, we can implement more complex shapes. For instance, using a css-clip-path generator like this, authors can implement complex shapes like this star:

lab is a room.

include simple multimedia effects for v10 by mathbrush.

release along with a "bisquixe" interpreter.

when play begins:
	css-set-fast ".Style_shape; width; 190px";
	css-set-fast ".Style_shape; height; 190px";
	css-set-fast ".Style_shape; background; maroon";
	css-set-fast ".Style_shape; display; inline-block";
	css-set-fast ".Style_shape; clip-path; polygon(50% 0%, 61% 35%, 98% 35%, 68% 57%, 79% 91%, 50% 70%, 21% 91%, 32% 57%, 2% 35%, 39% 35%)";
	
to say shape:
	set-any-class "shape";
	
instead of jumping:
	say shape;
	say " ";

rotation

It is possible to rotate an element or class. This is accomplished by specifying a value in degrees. For instance, this code

	css-set-fast ".Style_ipso; rotate; -45deg;";

Will rotate our custom class 45 degrees counterclockwise.

Note that the edges of our class reach beyond the borders of their original shape. If we want to keep things tidy, we will likely need to specify a larger margin value. Here is the same content with a 20% margin:

transform

Using the transform property, we can distort the shape of an element or class. A scale value will stretch or shrink our content according to both width (x axis) and height (y axis).

	css-set-fast ".Style_ipso; transform; scale(1, .5)";

Not that this isn’t intended to yield accurate resizes. In the above code, the shape will have its original width but only half its height.

That’s not all. We can add a skew value to shift a shape along X axis, Y axis, or both.

	css-set-fast ".Style_shape; transform; skew(30deg, 0deg)";

translate can be used to adjust the placement of an element or class. A transform value consists of two values, horizontal (x) and vertical (y). Note that it is possible to push a shape outside the boundaries of its container, so we should take care to use margin, height, and width values judiciously. That being so, let’s additionally adjust the size and scale of our shape to accommodate this change.

when play begins:
	css-set-fast ".Style_shape; width; 600px";
	css-set-fast ".Style_shape; height; 600px";
	css-set-fast ".Style_shape; background; maroon";
	css-set-fast ".Style_shape; display; inline-block";
	css-set-fast ".Style_shape; clip-path; polygon(50% 13%, 58% 38%, 85% 38%, 63% 54%, 71% 78%, 50% 63%, 29% 78%, 37% 54%, 15% 38%, 42% 38%)";
	css-set-fast ".Style_shape; translate; 60px 60px";

matrix is a complex transformation effect for modifying the behavior of 2d shapes. It allows authors to adjust scale, skew, and translate within a single property. Most of us will prefer the readability of added lines, but for the sake of this reference, an example should be shared.

A matrix invokes six numberical values as a comma-separated list. These numbers must be in a specific order:

scale (X)
skew (Y)
skew (X)
scale (Y)
translate (X)
translate (Y)

Let’s put it all together. A bottom-margin, a new clip-path, a rotate, and a matrix. This code specifies a shape that is .8 (80%) of its usual size, has no skewing, and has been moved over 50px and down 20px:

lab is a room.

include simple multimedia effects for v10 by mathbrush.

release along with a "bisquixe" interpreter.

when play begins:
	css-set-fast ".Style_shape; width; 500px";
	css-set-fast ".Style_shape; height; 500px";
	css-set-fast ".Style_shape; background; darkblue";
	css-set-fast ".Style_shape; display; inline-block";
	css-set-fast ".Style_shape; margin-bottom; 30px";
	css-set-fast ".Style_shape; clip-path; polygon(68% 15%, 85% 50%, 68% 85%, 15% 85%, 33% 50%, 15% 15%)";
	css-set-fast ".Style_shape; rotate; -30deg";
	css-set-fast ".Style_shape; transform; matrix(.80, 0, 0, .80, 50, 25)";

to say shape:
	set-any-class "shape";
	
instead of jumping:
	say shape;
	say " ";

The result:


Manipulating the appearance of shapes is a complex topic, but, thanks to the ubiquitousness of CSS documentation and resources, we have a lot of help at our disposal.

Note that these tactics can be applied to images, a possibility that will interest many authors. Our discussions regarding images have not yet ended; we will return to them soon as a more advanced topic.

3 Likes

Gradients

It is possible to fill a class or element with more than one color, and these changes can consist of smooth transitions or hard stops. We do this by applying a new kind of value involving various kinds of gradients.

For instance, if we style the the bufferline as follows:

when play begins:
	css-set-fast ".BufferWindow; background; linear-gradient(to bottom left, #E7E9D5 50%, #E99EE1 50%)";

Note the distinction of to bottom. A gradient progresses in a specific direction, and here this linear-gradient will progress from top right to bottom left. We will get two equally-distributed areas because each color receives an even 50% of the .BufferLine. There is no overlap, so there is no actual gradient but rather clearly-separated zones.


In order to to implement a graduated color shift, we should specify a color stop value for only one of the color values.

In this case,

when play begins:
	css-set-fast ".BufferWindow; background; linear-gradient(to bottom left, #E7E9D5 50%, #E99EE1)";

will yield


We need not use only one color. The format remains the same; we need only add more color and stop position values:

when play begins:
	css-set-fast ".BufferWindow; background; linear-gradient(to bottom left, darkslategray 0%, Gainsboro 30%, FloralWhite 50%, Khaki 70%, Orange 100%)";

produces this effect:

We are not limited to linear-gradients. The additional options are radial-gradient, conic-gradient and versions of these three that repeat.

While this reference cannot cover all the permutations, hopefully we will be able to share some interesting examples once this part of the reference is completed! For now, note that the basic ingredients of color-stop and color remain more or less the same. Take this radial-gradient example for instance:

when play begins:
	css-set-fast ".BufferWindow; background; radial-gradient(darkslategray 0%, Gainsboro 30%, FloralWhite 50%, Khaki 70%, Orange 100%)";

As a word of caution, note that gradients can complicate our plans for legibility, because we are considering color contrast in terms of multiple colors. Black text will be harder to read at the center of this example.


While they cannot assist us extradorinarily complex cases, there are many online gradient generators for CSS. Using one will help authors visualize the color combinations quickly without the need for frequent compiles.

Gradients, like other sorts of background value, can be specified for custom classes as well.

2 Likes

Introducing hyperlinks

Bisquixe is not the only way to implement hyperlinks in an Inform game, but it does offer a very lightweight, flexible, and legible option for authors.

In bisquixe, we use the phrase

	hyperlink "[link text]" as "[command text]";

link text specifies the words that the player sees on screen. command text is the player’s command that is exectuted when the player clicks on the link text.

	hyperlink "jump as high as you can" as "jump";

Note that while hyperlinks operate at a basic level within other interpreters, we cannot adjust their appearance or employ advanced techniques discussed in later posts.

Since we are using printed text, we Bisquixe authors can style our links. IF we wish to style a link via an inline style, we can take this approach:

	css-set-fast ".Style_link a:link; color; maroon";

This construction invokes our custom class immediately follow by a link pseudoclass with out a semicolor or separator between them.

We can change the color property of a:link to suit a background color, and this often be necessary to provide players with adequate color contrast. Note that a:link affects all printed links. If we change this value in game—remember that Bisquixe changes CSS on the fly—every on-screen link will be affected.

Because not every color matches every background, a best practice is to set a common default via a:link, then go further to configure colors for custom classes.

lab is a room.

include simple multimedia effects for v10 by mathbrush.

release along with a "bisquixe" interpreter.

when play begins:
	css-set-fast ".Style_jmp; font-size; 25px";
	css-set-fast ".Style_jmp a:link; color; black";
	css-set-fast ".Style_jmp; background; orange";
	css-set-fast ".Style_jmp; font-family; sans-serif";
	
to say jmp:
	set-any-class "jmp";
	
the description of lab is "[lab]";

to say lab:
	hyperlink "On the count of three, [jmp]Jump as high as you can![roman type] You can do it." as "jump";

Note that we use a to say lab phrase to define our hyperlink, then add it inline to out “Jump as high as you can!” text. Since we will usually want our links to print as part of some larger text, this is a commonly-used tactic.


It’s useful to think of hyperlinks as a form of specialized text. With few exceptions, we handle them as we would other substitutions. As we’ll see in the next post, this affords many opportunities to us as authors.

3 Likes

More advanced applications of hyperlinks

Working from the perspective of handling hyperlinks as text immediately reveals opportunities. Perhaps we would like to treat every noun in a room description as a hyperlink that causes a game to examine the think referred to. We can do this by using the printing the name of something activity.

Note that, when we are dealing with text rather than things, we always invoke the printed name of [something] rather than just [something] by itself. Consider this example:

lab is a room.

include simple multimedia effects for v10 by mathbrush.

release along with a "bisquixe" interpreter.

when play begins:
	css-set-fast "a:link; color; blue";

[************]

rule for printing the name of a thing (called the widget):
	hyperlink "[the printed name of the widget in upper case]" as "examine [the printed name of the widget]";
	
[************]

the decorative bust is scenery in lab.
the beaded curtain is scenery in lab.

the description of lab is "This rather tastlessly decorated laboratory features a hideous [beaded curtain] as well as a poorly-constucted [decorative bust].

Just being here gives you a headache."

Note that these links will print in upper case letters for legibility’s sake.

Our rule generating the hyperlink text deals with printed names, while the actual name of a thing refers specifically to in-game things.

To leverage this example, we need only encapsulate the name of a thing in our text to generate the relevant hyperlink.


We can go further. Perhaps we would like to hyperlink exits mentioned in the texts of our room descriptions:

rule for printing the name of a direction (called the way):
	hyperlink "[the printed name of the way in upper case]" as "go [the printed name of the way]";

Alternately, building off of our rule for printing the name of a direction, we can use a list to create a simple exit lister with hyperlinks.

last after looking:
	let X be a list of directions;
	let command be a text;
	repeat with way running through directions:
		if the room way of the location is a room:
			add way to X;
	if the number of entries in X is zero:
		say "Unfortunately, there seems to be no way out.";
	otherwise:
		say "[bold type]Available exits:[roman type]";
		say line break;
		say x;
		say line break;

Note that links remain onscreen even after they no longer apply, such as when a player leaves a room. Depending on the context, that can be confusing. Some alternatives will be discussed in sample “recipes” once this reference is complete.

We can add hyperlinks to a list dynamically. Perhaps we wish to add links to a list based on whether or not they seem applicable.

the cmdBar is a list of texts that varies.

to say tk:
	hyperlink "taking something" as "take";
	
to say ex:
	hyperlink "examining something" as "examine";
	
to say drp:
	hyperlink "dropping something" as "drop";

last after looking:
	truncate cmdBar to 0 entries;
	if there is a portable thing (called the widget) in the location and the widget is not the player, add "[tk]" to cmdBar;
	add "[ex]" to cmdBar;
	if the player encloses something, add "[drp]" to the cmdBar;
	say "Possible commands include [cmdBar].";


Note that adding hyperlinks to a table is not possible without a bid of dark magic. I’ll discuss an approach to this in the “recipes” section below.

The bottom line is that while hyperlinks are easy to implement, their capabilities are readily extended via CSS, text substitutions, and lists.

2 Likes

(this post is reserved for a future update regarding hyperlinks)

2 Likes

Image scaling

We can add scaling support for images in Bisquixe. If we want to assign seettings at the global level, i.e., applying to all images. We do so by specifying the width properties for the img element.

This works the same way, whether we are using the ifsetgen.py or Bisquixe’s own add-image phrasing.

when play begins:
	css-set-fast "img; height; auto !important";
	css-set-fast "img; width; 45% !important";

The !important designation is required if we are to override the set behavior of printing all images at native size.

There is a bit of an art to this. Ideally, the player can see the whole image at a time. For wide images that aren’t very wide, it will usually be enough to specify width; 100% !important. However, with taller images, it might be better to scale back the width so that the entire image displays.

Styling img applies to every image on-screen or in the scroll buffer. If we have multiple images with varied dimensions, they will all be scaled identically. One solution—should this be a problem—is to clear the screen before displaying a given image. I employed this tactic in the post-game gallery for Marbles, D, and the Sinister Spotlight.

A benefit to using the add-image technique native to Bisquixe is that we can specify image size per individual image. This requires that we designate the specific image file. The format is more or like this:

	css-set-fast "img[src="Figures/mMatisse.jpg"]; width; 25% !important";
	css-set-fast "img[src="Figures/mMatisse.jpg"]; height; auto !important";

There’s a problem, though, isn’t there? Inform reserves brackets and quotation marks for specific use. Since css-set-fast is sending text to html, we should format the string like we would to print any other string.

We can send quotation marks via the apostrophe character ['] and brackets via open bracket and close bracket.

Here’s the string we’ll use.

	css-set-fast "img[bracket]src='Figures/mMatisse.jpg'[close bracket]; width; 25% !important";
	css-set-fast "img[bracket]src='Figures/mMatisse.jpg'[close bracket]; height; auto !important";

Note that this is not fully equal to an inline solution. Every time this image prints, it will print at these dimensions until we specify new ones. In most cases, though, that will be all that we require.

These CSS settings apply only to our web release. Standalone interpreters will handle things as they were written to handle them.

Parchment support for image scaling is coming soon. In the meantime, authors releasing games with Parchment can add a general setting for image scaling directly into the CSS (glkote.css), should they prefer it for sound support or for any other reason:

img {
	width: 35% !important;
	height: auto !important;
}
3 Likes

Accessibility

It is widely held that standalone interpreters offer better screen reader support than do web games. Many people who use screenreaders say so, and they should have the final word. Setting aside valid questions of artistic intent, authors may wish to release a story file for this reason alone.

Not all Inform games are screen reader-friendly, of course. ASCII art, for instance, or heavy use of graphical symbols can come across as grating or nonsensical when delivered in audio format. Images will require alt text. This reference cannot make platform decisions for authors, but it strongly encourages them to spend some time with the question of whether or not they intend to release a screen reader-friendly game. This should not only encompass the story format, but also the presence of images and character graphics.

If we do release a standalone story file with images, we’d do well to ensure that image descriptions print reliably. Given the multitude of interpreters out there, players would be wise to incorporate a specific screen reader mode. Marbles, D, and the Sinister Spotlight handles images this way (note also that the game displays different images depending on whether it is running on Bisquixe):

to say red:
	if screenreader is true:
		say "An small, adolescent cat with wide eyes looks to the camera with a serious expression. She is perched on a curved, modernistic chair. The combination is both dramatic and silly.";
	otherwise if bisquixe is active:
		follow the tall images rule;
		display figure chair;
	otherwise:
		display figure lowchair.

We will likely want to go further, scrutinizing our use of characters. In Portrait with Wolf, there is an interface that prints a complete input history for the player. Visually, it displays with a vertical line (|) as a separator between choices. However, in screenreader mode, the vertical line is not a meaningful separator. Instead, it prints a comma (,) character because commas create a longer pause. Visual mode looks like this:

Portrait 2 (Series II, Cat): 
|  C  |  C  |  C  |  C  |  C  |  C  |

But screen reader output looks like this

Portrait 2 (Series II, Cat): 
,  C  ,  C  ,  C  ,  C  ,  C  ,  C  ,

Accessibility requires technical knowledge, but understanding what accessibility demands requires research and empathy. The better we can understand the experiences of others, the better we consider them in our designs.

Some persons are light sensitive. How can we accommodate them? The truth is that there is no perfect color scheme. Some prefer a light background, while others prefer something dark. An ideal game will likely offer both options via a toggle. Having made it this far, readers will likely be able to guess what is happening in this latest update to Repeat the Ending.

coloring is an action out of world applying to nothing.
understand "color" and "color mode" and "mode" and "dark mode" and "light mode" as coloring.

carry out coloring:
	if color mode is 1:
		follow the light mode presentation rule;
		now color mode is 2;
	otherwise if color mode is 2:
		now color mode is 1;
		follow the dark mode presentation rule;
	say "[if color mode is 1]Dark mode is now active[otherwise]Light mode is now active[end if].";

If our game features sudden shifts between large fields of light and dark colors, we should warn players. If, on the other hand, our work plays loud noises unexpectedly, we really ought to let players know.

As we have previously discussed, authors are advised to verify the correct combination of color contrast and font-size.

This is only scratching the surface. How do we make parser games “accessible” in the broadest sense? We should consider ways of tracking information and making it visible to the player, be that through goal lists, visual aids, or hinting systems. What are obstacles that can prevent new players from adopting our hobby? What is in the way? For those of us who have been playing interactive fiction for decades, it will take empathy and imagination to reach the answers.

In this last sense of “accessibility,” Bisquixe offers new ways of making parser games accessible to new players.

3 Likes

Directly editing extensions. templates, and CSS

In rare cases, we may want to edit the default CSS for our projects. Perhaps we want to apply a change to every one of our projects without having to code it every time. Perhaps, on the other hand, we need to add something that is too complex for a css-set-fast string to handle.

In the first case, my own default CSS contains this setting for honoring white space.

For instance, I customize the amount of extra .play area reserved on-screen. If the screen is not at least a specific width, it cuts out the .play gutters altogether.

As a reminder, most game-specifc CSS is located where user documents are located here: Inform/Templates/Bisquixe/glkote.css. If we are usingifsitegen.py, we will need to update the same file within our bisquixe.zip, too.


/* ATTEMPT TO PERFORM MEDIA QUERY */

@media screen and (max-width: 900px) {
  #gameport {
    left: 0%;
	right: 0%;
	bottom: 0%;
	top: 0%;
  }
  .BufferWindow {
	  padding: 20px;
  }	
}

@media screen and (min-width: 901px) {
  #gameport {
    left: 18%;
	right: 18%;
	bottom: 0%;
	top: 0%;
  }
  .BufferWindow {
	  padding: 20px;
  }	
}

If we haven’t looked at CSS before, this can be daunting! However, because CSS is so well-documented, finding examples and sample code is usually easy. The top snippet specifies behavior for windows with widths of 900px or less. The second specifies anything larger.

When editing CSS, we should comment out original entries rather than deleting them, just in case we need a way back. CSS comments are bracketed between /* and */.

As many examples in this thread demonstrate, there are many cases where honoring white-space is desirable. This can be set globally by editing the CSS:

/* configuring white space */

.BufferLine {
	white-space: pre-wrap !important;
}

Because so much of the Simple Multimedia Effects extension uses Inform 6, a lot of it is beyond my—I speak only for myself—understanding. However, we still might have good reason to edit it. As previously discussed, Inform can only accept .ogg , .midi , .mod , and .aiff files. Meanwhile, mobile Safari browsers only accomodate bisquixe sounds formatted as .MP3s.

By default, Bisquixe is hard-coded to affix an .mp3 extension to a sound file. If for some reason authors wish to disable this, Simple Multimedia Eeffects can be edited. IDE users will edit extensions there. Simply select File->Open Installed Extension and then browse to the desired file. In this case, the code has been altered in this way:

To upload-audio (Temp - a text) with internal name (Temp1 - a sound name):
	let tempid be the Glulx resource ID of Temp1;
[	let tempname be "[temp].mp3";]
	let tempname be "[temp]";
	add-audio tempname with id tempid;

Note that the original code has been commented out rather than deleted. This is always a good practice!

In practice, editing the building blocks of our web games is seldom necessary, and care should be taken to consider the implications of making global changes to our authoring environment.

3 Likes

Troubleshooting

In Inform, just as in life, things do not always turn out the way we plan. Sometimes, our problems are obvious and easily mended, but we occasionally have a genuine whodunnit on our hands. How can we solve such mysteries?

A good first step is to wade into the the developer tools for our page. Click on the part of the page that is behaving unexpectedly, and select inspect. What we see may be overwhelming at first, but this reference has prepared us in a general way for interpreting it.

The window will be split into two frames. At left will be our page, and at right we see a structured view of HTML elements and relevant CSS. In this pane, I have clicked on the orange-backed hyperlink:

We can resize these panes at will. At center will be the specific web content that we clicked on, and to its right will be all relevant CSS. Each CSS entry will also state where it is coming from. These entries are also listed in order of precedence. Entries at the top will generally be the ones applied unless we add an !important designation to something further down the ladder.

Do we see our entry there?

If not, we likely have a formatting problem or typo with our initial class, element, or property. CSS (and therefore our code) can be (though not always) sensitive to spacing. We may have an entry that is not compatible with Bisquixe’s format. In nearly every case, the failure of an entry to appear in the rightmost pane indicates a problem with the first two-thirds of our css-set-fast string.

Is our entry there, but struck through with a line?

This is, as already stated, likely to be a problem of precedence. CSS is parsed according to a system of priorites known as the CSS Cascade. Like Inform, CSS has an affinity for the specific. .BufferLine, for instance, usually inherits CSS properties from .BufferWindow. If we intervene, styling .BufferLine directly, that is a more specific tactic that will take priority over inheritence.

If we have a case where being specific isn’t enough, we should have a look at our inspector to see what entries are above it. One of them is taking precedence. Can we see why? Should we specify one of them instead?

Is our entry there, but struck through with an orange-and-yellow triangle at left?

We can hover our mouse cursor over the triangle to read an error message. Most commonly, these errors pertain to improperly formatted or inapplicable values. If we have specified a color for a width property, that will surely turn up here. Most of the time, though, our problems are more subtle. Perhaps a rather complex clip path value is missing a comma somewhere. The format for a CSS entry is typically rigid. Consider this entry. What is wrong with it?

	css-set-fast ".BufferWindow; background; linear-gradient (blue, red)";


CSS will not tolerate a space between linear-gradient and (. These distinctions can be difficult to identify! Sometimes, we could use a second set of eyes. Showing our code to people or creating a thread at intfiction.org is always a good option, as this a friendly and helpful community.

Other difficulties

Because formatting for css-set-fast is specific, it may not always be clear how to engage with a specific property or grant it precedence. As recently discussed, for instance, it is not enough to style a link via a custom class. Rather, we must specify both class and a: link all at once.

	css-set-fast ".Style_jmp a:link; color; black";

How are we to know such things? An internet search will turn up some answers, but this is again an opportunity to create a thread. Making a new thread benefits the community because others experiencing our problem can find answers in a search.

Another option is to attempt to recreate the desired effect in the game’s glkote.css file. If we can get our changes working there, we must have a difficulty translating native CSS to Bisquixe’s specific format.

In my own anecdotal case, the most common problems arise from formatting and typos. As consolation, the more difficult, whodunnit-style mysteries are the most gratifying to solve.

2 Likes

Onward

In the cultural history of IF, graphics in text adventures have sometimes been looked at with suspicion. Mostly this is because attempts in the 1980s were not very successful, because computer graphics were so poor then (by modern standards). It may be that some people also felt that the takeover of computer games by graphical interfaces was the death knell of IF. But pictures are now rendered in superb quality by computers, and the death of IF turned out to be an exaggeration, so it is time to move on.

—Graham Nelson, Writing with Inform

Inform is far more capable than it was when it first appeared. This hasn’t happened by magic, of course. An uncountable number of hours have been spent by a whole host of people to introduce new features, improve stability, and, yes, enhance support for audiovisual content. While Inform itself is not updated often, that does not mean that the Inform ecosystem is static. Extensions are released or updated often, and many interpreters are, too. Specifications evolve. Ongoing technical discussions, both in terms of future platforms as well as current authorial efforts, can be lively indeed.

While parser games can seem a conservative or even immobile category, the truth under the hood is that the world of Inform authorship is dynamic and constantly evolving. At the time of this writing, the 2026 Spring Thing Festival of Interactive Fiction has just gone live. Three years ago, nearly to this day, I struggled to customize the appearance of my first game, Repeat the Ending.

Look at us now, at the end of a reference intended to solve such problems! So much has changed. Styling an Inform game is now an option for anyone interested in trying. Having a common framework for making these changes, we can help one-another realize our artistic intents.

Previously, advanced customization of an Inform game involved some knowledge of Javascript. With Bisquixe, we can build upon our knowledge of Inform code, and maintain everything within a single project. Rapid developments in this field demonstrate just how dynamic and exciting Inform authorship can be!

I have said—and I truly believe this—that we authors should think of Inform’s future. How do we attract new players? Is it possible to maintain all the rich complexity of Inform’s world model while taking inspiration from platforms like Ink and Twine? So much possibility lies before us, should we choose to embrace it.

It’s a journey that starts simply, with css-set-fast, but who knows where it might go? Only you can say.

4 Likes

Acknowledgements

Graham Nelson (Inform)
Mathbrush (Bisquixe)
Zarf (Quixe)
Danni (Parchment)
Daniel Stelzer (Numerous improvements and hyperlink development)
Zed (CSS guidance)
rh (CSS guidance)
Josh Grams (advanced extension advice)
BJ Best (Beginner’s Guide to Styling Inform Releases with Bisquixe)

(there may be more)

3 Likes

OK! At this point, I’d like to open the floor for discussion. A couple of requests.

  1. If you have something potentially contentious or controversial to say, don’t hold back! But please make a new thread so that we don’t get derailed here.
  2. If you need help with a specific problem, we are here to help! But please make a new thread so that others needing help can find your solution in a search.

Request for examples, code, and demos

If you have an example of using Bisquixe that could benefit the community, please add it in a reply. Ideally, it will be accompanied by some sort of brief explanation if its operation is not obvious. I will add all such examples in the ToC and keep a tally of how many examples individual users have contributed. This will be maintained in the top post.

4 Likes

Storybook

Here’s a very simple template for customizing a font, a color scheme, and creating a custom class for printing a larger first letter (after the style of storybooks). Note that this font will not be legible for everyone, even though it’s displayed with high contrast and large character size.

For that reason, consider this a ready example to build upon rather than something to drop in a work, choosing font and colors that complement a specific work.

This example also demonstrates the use of spacing and substitution to create “tabs” for text layout.

Note that “.BufferLine; white-space; pre-wrap” will be needed to preserve the tab stops. I have added it to my default CSS for occasions such as this.

Code
ab is a room.

include simple multimedia effects for v10 by mathbrush.
include basic screen effects by emily short.

release along with a "bisquixe" interpreter.
	
this is the initial window setup rule:
	import-google-fonts "Macondo";
	css-set-fast ".BufferLine; white-space; pre-wrap";
	css-set-fast ".BufferWindow; background; #F1E9D2";
	css-set-fast ".BufferWindow; font-family; Macondo, sans-serif";
	css-set-fast ".BufferWindow; font-size; 26px";
	css-set-fast ".GridWindow; background; #2b1d0e";
	css-set-fast ".GridWindow; color; #faf4ef";
	css-set-fast ".GridWindow; font-size; 24px";
	css-set-fast ".interpretercredit; display; none";

this is the first letter rule:
	css-set-fast ".Style_letter; font-family; inherit";
	css-set-fast ".Style_letter; font-size; 65px";
	css-set-fast ".Style_letter; line-height; 65px";
	
to say letter:
	set-any-class "letter";
	
when play begins:
	follow the initial window setup rule;
	follow the first letter rule;
	say portrait;
	wait for any key;
	

to say portrait:
	say "[letter]O[roman type]nce upon a time and a very good time it was there was a moocow coming down along the road and this moocow that was coming down along the road met a nicens little boy named baby tuckoo....

His father told him that story: his father looked at him through a glass: he had a hairy face.

He was baby tuckoo. The moocow came down the road where Betty Byrne lived: she sold lemon platt.

[fixed letter spacing]    [variable letter spacing]O, the wild rose blossoms
[line break][fixed letter spacing]    [variable letter spacing]On the little green place.

He sang that song. That was his song.

[fixed letter spacing]    [variable letter spacing]O, the green wothe botheth.

When you wet the bed, first it is warm then it gets cold. His mother put on the oilsheet. That had the queer smell.

His mother had a nicer smell than his father. She played on the piano the sailor’s hornpipe for him to dance. He danced:

[fixed letter spacing]    [variable letter spacing]Tralala lala,
[line break][fixed letter spacing]    [variable letter spacing]Tralala tralaladdy,
[line break][fixed letter spacing]    [variable letter spacing]Tralala lala,
[line break][fixed letter spacing]    [variable letter spacing]Tralala lala."
2 Likes